I started making tutorials over one year ago with my ‘simple td’ tutorial. Shortly after, I improved on it with my ‘advanced td’ tutorial... but, both of those are well out of date now... which brings me to:
Versus TD Tutorial (Done on patch 1.3.6 of SC2)
This is a brand new tower defense tutorial, co-released in video and text format!
THIS TUTORIAL IS FOR BEGINNERS. I GO THROUGH EVERY STEP RIGOROUSLY.
I view this tutorial as a journey; if you can finish it you will be rewarded... but if you already know how to do things then this may be a bit ‘long’ for you...
You can watch that ^ or read below and go through the text tutorial.
(I think this text portion is a Guinness World Record for longest tutorial...)
This tutorial will feature:
4 players, split onto 2 sides, competing to last the longest.
Mobs will spawn continuously on a timer.
Players can choose between 2 races (choose in a dialog at the start).
One tower for each race (yeah, just one for each... but you can easily keep duplicating).
Fully working leaderboard
Player-leaves-game trigger
Anti-block
Tower selling
Few more minor things too.
The only notable thing I do not show is tower upgrading (I have shown this in both previous tuts).
Structure
First will be the terrain and basic setup
Second will be the data editor
Third will be the trigger editor
(Sorry, formatting/coloring gets crappier near the end because I gave up, took way too long to format it all lol!)
PART 1 - SETUP AND TERRAIN
With the Starcraft 2 Editor open (accessible from where you installed SC2), hit File->New. This window will pop up:
Set the width and height both to 88 (ideal for 4 players).
Set the Texture Set to Korhal (Urban).
Click on Korhal Grass as in the image above (this is the initial texture).
Make sure Document Type is on Map
Hit “Modify...” (near the top right).
This window, “Document Dependencies”, will pop up:
Click “Add Standard...” and the window above will show.
Check off Liberty (Campaign) and Liberty Story (Campaign) and hit OK and then OK. → This will add in all of the necessary models from the campaign.
Now hit OK on the original “New Document” window and let it load until you’re presented with an endless sea of grass terrain!
→ We will be painting some cliffs to build boundaries for the players. As well, some texturing to spruce it up (if only slightly even).
Hit the “T” key (or tap the “Layer” button at the top and click on “Terrain”) to switch to the Terrain Layer. The left pane should now look somewhat like so:
Set Brush to Cliff
Set Operation to Lower Cliff
Set Type to Korhal Skyscraper Cliffs
Set Size to 4
Set Shape to Square if not already on it.
→ We are going to paint a ‘valley’ in between the two sides.
Zoom out on the terrain using mouse-wheel, and pan to the center by right-mouse dragging. → Hit “G” to show grids if needed (and hit “O” to show camera bounds also if desired).
Paint down the center somewhat like in the above image.
Now switch to the Raise Cliff Operation.
Paint around the boundaries (inside the blue boundary line), but leave spaces at the top and bottom of both sides for the mobs (see images below). → PLEASE do a nicer job than me; I rushed through pretty fast for video so it looks quite crappy lol.
In the end the shape should look like the last picture of my minimap (although like I said, please do it much straighter and nicer).
Now Click on the Texture Brush mode and choose the Operation of Fill Texture.
Choose Korhal Small Tiles as the Type. (see image below).
Now click once on each of the raised-cliffs to fill in the tile texture. This gives the player a better indication of where they can build (and where not).
Next we will paint some concrete around the mob-spawn areas and mob-end areas (again for a visual indicator).
→ Please paint it up nicer than me as I was rushing for video.
Switch to the “Add Texture” Operation
Switch to Korhal Concrete “Type”
Choose the thick-circle “Style” (this style paints harder edge-lines of the texture).
Increment, size, and speed are all fine, but you can play with those if you like. See image below...
(Paint concrete in 4 places: left mob spawn, right mob spawn, left mob exit, right mob exit)
→ That’s it for terrain in terms of bare-bones. Feel free to have some artistic license and paint around or make more interesting paths for the mobs.
Now we will place a nice dashed-line doodad on the mob-exit points.
Hit “D” to enter the doodads layer or choose Layer->Doodads from the top bar.
On the left pane, search for Decal and click on the result named just “Decal”.
Now if you mouse back onto the terrain you should see some random decal under your mouse.
Use the comma and period keys on your keyboard to swap between the types of Decals → (as an FYI, using comma/period will work for any doodad that has variations... but not all have them).
Keep switching until you find this one:
Place it somewhere close to the concrete we painted at the left side’s mob exit.
Now hit ‘escape’ to exit placement mode (and subsequently enter selection mode).
Double-Click on the dashed line (or Single-Click on it and tap your Enter key).
Type in 0 for Rotation and hit OK.→ Now the decal should be horizontally aligned.
Drag it in a nice spot along the concrete edge as so:
With it still selected, copy it (Ctrl+C)...
Paste (Ctrl+V) and you should have a duplicate now attached to your mouse. Place it beside the first one.
...repeat until you hit the end:
→ Line them up as best you can if they don’t fit perfectly :)
Let’s duplicate these 3 (or more if you have) for the other side’s mob-exit.
Hit escape to make sure you aren’t in placement mode
Drag-select around all of the decals.
Hit Ctrl+C again and then Ctrl+V them down onto the new spot like so:
At this point we are done with doodads; however, you can explore all of the cool doodads and drop some around for some decent eye candy. Be careful about symmetry though.
We will now place some points which will be used by triggers later for spawning mobs and spawning the players’ builders.
Hit your P key to go to the Points Layer or (as usual) you can hit Layer->Points from the top bar.
Click on “Normal” for Add Point:
We are going to place 4 points (one for each player’s builder spawn). Drop the first point in this area:
Now drop the next 3 points based on these images (or be creative if you feel like): → Keep in mind I’m using Point 1 as player 1’s area, Point 2 for Player 2, etc... but you can rename your points if you desire (right click them in the left pane to rename). But let me be clear on one thing: Players 1 & 2 will be on the left; Players 3 & 4 will be on the right.
And finally drop a 5th point in the top left mob spawn and then a 6th point in the top right mob spawn:
(Note: make sure they are inside the blue boundary line. Adjust your concrete paint if necessary).
Woohoo, done with points!
Next, we will be creating 2 regions for the mob-exits. These will be used in triggers to detect when a mob has reached the end of a lane.
Hit R on your keyboard or Layer->Regions from the top bar. On the left pane now, click on the Rectangle:
Drag on the left side’s mob-end point as in the image below: → If you need to re-adjust it, hit escape and then select/drag it. Then repeat the previous step to go back into ‘add region’ mode.
When ready, now drag another region on the right side’s mob-end zone. → You could also copy paste the last one we just made; however, you may have to resize it (escape, then double click the region and adjust the size values).
We’re done with regions, now onto pathing blockers...
We are going to paint some pathing to prevent players from running into no-no zones. As well, to prevent building on no-no areas :D
Hit “H” to go to the pathing layer (or Layer->Pathing from top menu).
Select the buttons as in the image below (we are painting to add ‘no building’ pathing).
Now paint the no-build pathing over all 4 concrete spots (mob spawns/ends) like so: → If you make a mistake, you can switch to the ‘remove pathing’ button and then paint that to erase any over-painted areas.
Once finished with that, we will be painting ‘No Pathing’ around every other boundary. Set your tools like so:
Now paint around the edges: Keep painting until all areas you don’t want the player to access are covered (including the center boundary if you wish).
Pathing is done!
Time to set up the map info.
Hit the Map button on the top toolbar and click on “Map Info”. This window should pop up: → The Name field will be what your map appears as on Battle.Net (note: this can be completely different than your physical map-file name).
I believe Author and Description-Basic are ignored by Battle.net, but feel free to fill them in.
Description-Extended is not though, so make sure you fill that in so people are enticed to try your map!
The only other important tab here is the Loading Screen:
Here you can choose “Custom” which will show a black background, unless you choose an image.
You can also enter text for the Title, Body, etc... such as patch notes for your map!
When done, hit OK.
Player Setup now...
→ We will add all of the players for the map.
Hit the Map button again, except this time choose “Player Properties”.
Pretty simple:
Click on player 2’s row, and then on the right, change the Control to be “User”.
Do this for players 3 and 4 as well.
DO NOT change anything else for these players. It will mess up your publishing. I won’t be showing how to publish in this tutorial, but you can find how on sc2mapster.
Now click on player 5’s row and change the Control to Computer.
Do this for player 6 too.
→ These will be the players that control the waves/mobs.
Hit OK and we’re done with this step... no wait... were done with this section!!!!!!!!! YEAH!!!!!!! At this point the map is all prepared to be injected with some units, towers, and all of the logic.
PART 2 – DATA EDITOR
So... Data... time to make some towers! Then we will make the builders and mobs.
Hit the data editor button on the top bar:
A window should pop up: The data editor.
The first check I will make with you is that you have the right settings. Note that patch 1.4 looks slightly different.
See that your buttons are pressed in the same fashion as mine around the borders (you can see what they do on your own time): (All 5 at the top right, and then the observer button plus that other one just above this text)
As you can see I’m already on the Units tab.
Use the Data Type drop down to pick the Units tab if you aren’t already on it.
Also make sure Data Source is set to All Data.
Now search for “Photon Cannon”. We are going to duplicate it and make it into our first tower: The Sun Shooter. Right-Click on any one of them (I used the one with ‘Source’ of LibertyStory).
Choose Duplicate Unit from the options.
A window will pop up with a bunch of checkboxes. So what do these checkboxes represent? Well, by checking a box, we are saying we want to duplicate that element also. By not checking a box, we are saying that we just want to ‘link’ to the already-made object. Eg for abilities, I would check Attack if I wanted to make my own version of the Attack ability; Otherwise by not checking Attack, our duplicate unit would use the Attack ability already present in the editor.
Well, check off the following items:
Actors
Photon Cannon
Photon Cannon Attack
Photon Cannon Splat
ProtossBuildingBirthSmall (Unnamed)
Effects
Phase Cannon – Photon Cannon (Damage)
Phase Cannon – Photon Cannon (Launch Missile)
Models
Photon Cannon
Turrets
Photon Cannon
Units
Weapon – Photon Cannon Weapon
Weapons
Phase Cannon – Photon Cannon
→ Explanation for those who care: We want a duplicate of the ‘photon cannon’ actor because every unit needs an actor, period. An actor controls the visual aspects of the unit while the ‘Unit’ itself is just really a mathematical object. Subsequently the actor uses a model so I have decided to check the Model for it as well (actually optional though).
The Photon Cannon Attack actor was chosen because that is linked to the weapon and needs to be duplicated for our duplicate weapon.
The splat actor is just for the shadow under the tower, and the birth is so our towers can have their own birth actor (not necessary).
The effects (ignoring splash damage) were duplicated because the weapon is being duplicated.
The turret is so that our tower’s turret turns to face the enemy.
The weapon under ‘Units’ was checked because that is for the missile of the weapon.
Finally, the weapon itself is chosen because we want to make our own weapon. Weapon controls attack speed and performs a launch missile effect; in turn, the Launch Missile effect creates the weapon-unit as the missile and that missile moves along to the target. Furthermore, once the missile hits the target, the Launch Missile effect tells it to perform the Damage effect on the target. MEANWHILE, the attack actor we checked off earlier controls the visual aspects of this chain (sparks, sounds, etc). Side note: Unfortunately duplication does have one problem: It doesn’t duplicate everything we need. So, later we will be doing some more granular copy-pasting to fix up some things. Don’t worry atm.
Now hit OK with those items checked.
You will now see your new duplicate and its ‘hierarchy chain’ in the Object Explorer (bottom left pane):
The first and lengthy task is to rename everything (as well as some minor fixes).
Scroll down in the object explorer to the Weapons group.
Follow in order please: 1. (Weapons) Phase Cannon – Photon Cannon Copy.
Double-Click and a window pops up:
Change the Name to be Sun Shooter
Click Suggest so the editor’s internal “ID” for this unit is also the same (though not essential, it’s good to be clean and thorough).
Hit OK.
Now you should see its name has changed (the object explorer scrolled up probably, so scroll back down).
HOWEVER, it will still say that lame “Phase Cannon” in front. Blizzard used an “Editor Prefix” to do this... editor prefixes are text that you can put on data that’s only visible to the editor.
In this case, we don’t want any prefix:
Re-select our newly renamed weapon.
In the right pane now, Double-Click on the field “Editor Prefix”:
Delete the text in there and hit OK.
Good! Now we can move onto the next item:
2. (Units) Weapon – Photon Cannon Weapon Copy.
Double-Click and set the Name to be “Sun Shooter Weapon”.
Also hit suggest and then hit OK.
There’s one issue we have to take care of with this “Sun Shooter Weapon” object. Since it is the ‘Unit’ that is the missile of our weapon (weapon missiles are just units btw), it controls the movement of the missile. However, when we renamed it, it AUTO changed the name of its mover (Blizz built this into the editor... while useful sometimes it screwed us up here).
So to fix that, click on our newly renamed “Sun Shooter Weapon” if not already on it (may have to scroll back down in the object explorer).
Now on the right (and giant) pane, find the field “Movement – Mover”:
Double click this and it’ll pop up with a blank field selected in a drop-down box.
Change the drop-down to be on “Photon Cannon Weapon” and hit OK.
I won’t give more details than this for now; movers are pretty darn complex.
→ From now on when I say 'rename', I intend for you to click Suggest as well.
3. (Turrets) Photon Cannon Copy.
Double-Click and rename to “Sun Shooter”.
4. (Models) Photon Cannon Copy.
Double-Click and rename to “Sun Shooter”.
→ Additional Step: After renaming, click on this item (may have to scroll down again).
Find the field on the right labeled “Model”:
You’ll see the model file specified here is completely wrong. It got auto-changed to be SunShooter.m3 which does not exist.
Therefore, Double-Click on this field and once it pops up, hit Browse.
In the subsequent window, search for “PhotonCannon”. Then expand the folders until you get to PhotonCannon.m3:
Hit OK and then OK again.
Back to the Object Explorer pane:
5. (Effects) Phase Cannon – Photon Cannon Copy
Double-Click and rename to “Sun Shooter Damage”.
→ Additional Step: Once you scroll back down to the effect, you will notice that “Phase Cannon” is still in its name. Once again, we have to clear the Editor Prefix field:
Double-Click the ‘Editor-Editor Prefix’ field, delete the “Phase Cannon” and hit OK.
→ Notice that I named it “Sun Team”. You will reuse this actor for all Sun towers rather than duplicating this actor every time. The reason for this is because this actor just plays a birth model when a tower is made... it is not individually tied to any unit.
If you click back on that ^ actor, you should see a field on the right labeled “Event – Events+”.
Double Click on the field to see this: In this event list, there are a bunch of ‘events’ each with actions. Most notably the ones for when a unit’s construction starts... which then create this actor. Based on the list above, an example would be that if a Dark Shrine’s construction is started, it will create this actor (the blue energy ball for Protoss btw). Then when the construction is done, it will ‘destroy’ this actor (the first grayed out event does this).
→ It’s pretty easy to add/remove events in here. You just right-click and Add Event OR you could just copy paste (and change) one of those events such as the one I have highlighted in the picture above. Right now, though, we don’t actually need to do anything because by duplicating this, it automatically added an event for our Photon Cannon Copy (raw name is PhotonCannon2 as you can see above ^).
When you make more Sun towers later though, rather than duplicate the “ProtossBuildingBirthSmall (Unnamed) actor every time, you could just add an event to this one (sort of how Obelisk, Dark Shrine, and Pylon were already in this one). By all means you could duplicate every time but it’s needless waste... and if you choose to do neither all it means is that your buildings will have no construction energy ball (cosmetic, but yeah...).
8. (Actors) Photon Cannon Splat Copy.
Rename to “Sun Shooter Splat”.
9. (Actors) Photon Cannon Copy.
Rename to “Sun Shooter”.
10. (Actors) Photon Cannon Attack Copy.
Rename to “Sun Shooter Attack”.
11. Finally now, we will rename the Unit itself.
In the object explorer, Double-Click on the top level Item, which should be named “Photon Cannon” as in the image below.
Rename to “Sun Shooter”.
Right after this it is likely your Sun Shooter will disappear and you’ll have lost its selection.
→ To remedy this, clear the search bar of 'Photon Cannon' and then change the ‘Data Source’ to the last option which should be your map’s name... in my case ‘C:/.../tutorial versus td...’
Now you should see your tower as above ^
Click on your ‘Sun Shooter’ tower. We are going to fix and change-up a lot of the values (such as attack speed, damage, etc...).
In the Object Explorer window again (bottom left pane in case you forgot), scroll down to the Weapons list and click on the “Sun Shooter” item under Weapons.
On the right pane, find the “Stats – Period” field.
Double-Click the value (should be initially 1.25 I think).
Change it to 0.25 and hit OK.→ This is the attack speed of the weapon. We are making this tower attack quickly (0.25s per attack).
Also in the weapon, find the field “Weapon – Target Filters”.
Double-Click this field.
In the new window, uncheck Ally, Neutral, and Player.This will prevent this tower from being able to attack allies basically. → You can also right click and change any of those other filters in the list (such as you could right click ‘Ground’ and change it from ‘Allowed’ to ‘Required’ if you wanted the tower to only hit ground targets. I will leave them the same.
Now we will go change the weapon’s damage:
In the Object Explorer pane, find “Sun Shooter Damage” under the Effects list.
Change the “Combat – Amount” field to be 3 instead of 20.
At this point our weapon will be doing 3 damage every 0.25 seconds. We can ignore most of the other fields in both the effects and the weapon (but feel free to explore). The reason for this is simply because we duplicated: many of the fields are already what we want them to be (ie weapon icon, or damage effect type).
Next up is ‘Sun Shooter Attack’ under the Actors list for our Sun Shooter. This actor controls the sounds and visuals of our weapon.
Everything works mathematically, but there is one crucial problem visually. When we did our initial duplication, the editor ignored one Actor which is pretty important... it is the ‘Photon Cannon Attack Missile’ Actor... responsible for giving a visual to the missile of our weapon.
As you can see (image below), this field in our Attack Actor is set but if you double click it, it just points to nothing but raw text. Sorry, we will have to manually copy paste this actor ourselves...
Note: In patch 1.4 I believe you can check-off the 'attack missile actor' initially and avoid this step. However, I didn't/couldn't at the time of making this so just follow along with me :)
To begin, switch to the Actors tab of the data editor (either through the drop-down or by clicking the tab if already visible).
Now search for “Photon Cannon” and change the Data Source back to “All Data”:
Click on ‘Photon Cannon Attack Missile’.
Copy and Paste it.
Rename to “Sun Shooter Attack Missile”.→ We will fix some fields in a sec...
You may notice there is also “Photon Cannon Turret” in this actor list (image above shows it too). This actually needs to be copy-pasted while we're here.→ Yes, earlier we duplicated a turret with our Sun Shooter... but the Turret itself requires a Turret Actor... which unfortunately wasn’t shown in our original duplication checkbox list (similar to how the Attack Missile actor wasn't).
So Copy+Paste that Photon Cannon Turret.
Rename to “Sun Shooter Turret”.
Both renamed actors have disappeared again so we have to clear the Search box of Photon Cannon and change Data Source back to your map (ie C:\...\versus td tutorial...).
You should now see:
Click on our newly renamed Sun Shooter Attack Missile. We need to fix some things:
Double-Click on the Token field as shown below.
In the popup window, change it to be Weapon – Sun Shooter Weapon(which is the missile unit we duplicated originally... who has been actorless up to this point).
That fixed most of it, but it accidentally auto-changes the Art-Model to be incorrect: Double-Click this field.
Change it to be “Photon Cannon Weapon” (and hit OK) which will make our missile be like the actual photon cannon energy ball.
You could pick something else if you like... And that’s it for the Attack Missile actor!
Onto the turret actor... Currently our Photon Cannon (or ‘Sun Shooter’) will not turn its little turret-ball when targeting enemies. Easily fixed though...
Click on the turret.
Now double-click on the field “Event – Events +”:
In the new window, click on the one and only event (TurretEnable.PhotonCannon):
On the right side now, change the Source Name field to be our Sun Shooter. Hit OK.
Now the turret of our tower will turn to face attackers.
We are done with actors! Since our Sun Shooter will directly replicate a Photon Cannon, we do not need to change anything in its main actor (ie icon, sounds, model, scale, tint, etc...). I will be showing that for the 2nd tower though.
Switch back to the Units tab. Click on our Sun Shooter.
→ Let’s go through and clean up the fields!
First is the Command Card:
Double-Click the 'Ability – Command Card+' field.
Click on the Detector button in the ‘mock’ command card.
We want to remove this button, so click the tiny red X on the right:
The square should be gray now with no more detector button. Hit OK.
Next field is “Behavior – Behaviors +”.
Double-Click it.
Click on the first one (Detector) and tap the red “X” button.
Do the same for the Power User line.
(Behaviors are passive abilities essentially, and we don’t want those ^ 2).
However, leave “Under Construction”.
Hit OK now.
Scroll down to “Cost – Cost”.
Double-Click this field.
In the popup, click on the Minerals row.
Change the value from 150 to 7 (If you wish, you can make it w/e price you like).
Hit OK.
Slightly below is “Editor-Description”.
Double-Click this field.
Clear the text.
Hit OK.
Move on down to “Movement – Pathing Footprint”.
Double-Click and change to be “Footprint 2x2 (Doodad)”.
Also change “Movement – Pathing Footprint (Placement)” to be that (Doodad) one.
→ The footprint controls how units collide around the base of our tower. 2x2 Doodad is ideal because it’s perfectly square (and essential to my anti-block later).
Next are the Shield fields.Not essential, but we will remove all shields (that Protoss units have) from this tower.
Set these four fields to 0:
YAYYYYYYYYYY... ONE TOWER DONE! If you’ve kept up, good job... this is intense stuff...
Now we will make a 2nd (and last for this tutorial) tower. It will not be for the Sun team; instead, it will be for the Shadow team (Shadow Blade will be its name, and it will be a Dark Templar shooting fire!)
Right click on our just-finished Sun Shooter unit, and click Duplicate: We will be duplicating based on our tower since it will save us the most time. I’ll be going a bit faster now (less pictures) for things we’ve already done.
In the popup window with checkboxes, check off the following:
Actors
Sun Shooter
Sun Shooter Attack
Sun Shooter Splat
Sun Team Building Birth (note: in the video I forgot to check this one. Sigh @ me).
Effects
Sun Shooter Damage
Sun Shooter LM
Models
Sun Shooter
Turrets
Sun Shooter
Units
Weapon – Sun Shooter Weapon
Weapons
Sun Shooter
Hit OK now.
Again we have to mass rename:
→ And as before, assume by ‘rename’ I mean double click the item in the object explorer and type in a new name, hit suggest, and then OK.
1. (Weapons) Sun Shooter Copy.
Rename to “Shadow Blade”.
2. (Effects) Sun Shooter Damage Copy.
Rename to “Shadow Blade Damage”.
3. (Effects) Sun Shooter LM Copy.
Rename to “Shadow Blade LM”.
4. (Actors) Sun Shooter Splat Copy.
Rename to “Shadow Blade Splat”.
5. (Actors) Sun Shooter Copy.
Rename to “Shadow Blade”.
6. (Actors) Sun Shooter Attack Copy.
Rename to “Shadow Blade Attack”.
7. (Actors) Sun Team Building Birth Copy:
Rename to “Shadow Team Building Birth”.→ Notice that I named it “Shadow Team”. You can reuse this actor for all Shadow towers rather than duplicating this actor every time (exactly like I mentioned for the Sun team).
7. (Models) Sun Shooter Copy.
Rename to “Shadow Blade”.
8. (Units) Weapon – Sun Shooter Weapon Copy.
Rename to “Shadow Blade Weapon”(Note: the initial ‘Weapon’ in the name is an editor prefix).
9. (Turrets) Sun Shooter Copy.
Rename to “Shadow Blade”.
Finally the unit itself, still named Sun Shooter (don’t confuse it with our other one... to be sure, when you double click and the window pops up, the ID should be SunShooter2).
→ Anyway, rename it to be “Shadow Blade”.
Renaming is done!
Next step is to change the model file (in the model) to be the Dark Templar one.
To do this, scroll back down in the object explorer (I assume you have our Shadow Blade tower selected still) and click on Shadow Blade under Models.
Find the field “Model” which should be pointing to something with PhotonCannon in it.
Double-Click and in the subsequent window hit Browse.
In the popup, search for “darktemplar”. Choose the one that doesn’t have a number:
Hit OK and then OK again.
Scroll down (if needed) and Double-Click on the “Texture Declarations+” field.
We will be removing all rows (see image below) since these are things that only mattered to the Photon Cannon model.
(Hit the red X button for all of the rows and then hit OK).
Scroll back up and Double-Click on the “Attachment Properties+” field.
Remove the only row there and hit OK: (If we didn’t do this, the game would give an error on the Dark Templar creation)
Now we will move onto the “Shadow Blade” Actor.
Firstly we will change the field “Art – Model (Placement)”.
Double-Click that field.
In the popup window, choose Shadow Blade from the drop-down list.
This will make it so when builders place this tower, it will be a Dark Templar model and not a Photon Cannon one lol.
Next to cleanup is “Combat – Custom Death +”.
Double-Click that field.
When the window pops up, delete the last row.(I believe this will fix a bug that would have occurred when (or if) our Shadow Blade tower dies/sells. Either way it’s good to do).
(Select this row and hit the red X).
Hit OK when done.
Now Double-Click “Combat – Death Effects+”.
Click on the first row of the popup window’s list:
As in the image below, change the Model drop-down to be Dark Templar Death, and the Sound drop-down to be DarkTemplar_Death.
These will be the standard sounds and visuals for when this tower explodes (from being sold).
Hit OK.
Next, Double-Click on “Sound – Sounds”. → This window will have a bunch of “Unknown” labeled items in the list. That basically means no sound for that action. However, we need to fix some of the other sounds in here:
Change Ready sound to be ‘DarkTemplar_Ready’.
Change What sound to be ‘DarkTemplar_What’.
Hit OK(Unless you want to change more sounds. Eg if you changed the Attack sound to an actual sound (other than unknown), it would play that when the player orders this tower to attack a target... otherwise nothing... which is fine for me.
Scroll down now and Double-Click on “UI – Hero Icon”.
In the popup, hit Browse.
In the next popup, search for “darktemplar” and click on this one:
Hit OK and OK.Note: The hero icon is not necessary (unless this was a hero), and in fact we will have to still change the actual unit icon... but Blizzard did both for all of their units so I do it too.
The good thing now though is that you can select the “UI-Hero Icon” field (if not already selected) and hit Ctrl+C to copy.
→ Now scroll down and click on the “UI – Unit Icon” field.
→ Hit Ctrl+V to paste it onto that. We can’t do this for every scenario but since these 2 fields reference icons it’s a simple copy-paste!
With the icons set, we need to also set the wireframe field...
Double-Click on “UI-Wireframe +”.
In the new window, select the first and only item in the list, and then hit Browse.
Search for darktemplar and find the correct wireframe icon from the list:
Hit OK and then OK.
With the Wireframe+ field still selected, hit Ctrl+C to copy it.
Then select the field above it named “UI – Group Icon+”.
Hit Ctrl+V to paste it over.
First actor done! But like before, we are missing the Attack Missile and Turret actors.
So, switch on over to the Actors tab of the Data Editor.
Clear your Search and make sure your Data Source is set to your map's if not already.
Copy + Paste the Sun Shooter Attack Missile.
Rename to be “Shadow Blade Attack Missile”.
Copy + Paste the Sun Shooter Turret.
Rename to be “Shadow Blade Turret”.
We will come back to those two actors... for now, click on the actor: Shadow Blade Attack.
Find the field “Combat – Launch Assets+” and Double-Click.
Ignore Animation.
You can also ignore Art. However, if you wanted, you could choose a model from the drop-down and that model would play on your tower when it shoots (ie smoke, gun-shots, etc...).
We do need to change the sound though. See the image above for what I chose...
Hit OK when done.
Next is “Target – Impact Map +”.This controls the visuals/sounds when the projectile hits the target.
Double-Click this field.
When the window pops up, select the first row (and really the only row that matters to us).
Change the tab from Animation to Art. You should see ‘Photon Cannon Attack Impact’. You can change this if you like, but I will leave it. I think that model just makes some blue sparks or so.
Switch to the Sound tab and feel free to change it to whatever you like. I changed it to ‘Dark Templar Attack Impact’.
Hit OK.
Attack actor is done, so onto the Attack Missile actor...
Select ‘Shadow Blade Attack Missile’ (should be right below the previous actor).
Double-Click the Token field and change it from ‘Weapon – Sun Shooter Weapon’ to be the one for Shadow Blade (see image below).
(This links it to the missile-unit for our tower’s weapon).
You could move on here, but I want to change the look of the Shadow Blade’s projectile so it’s not just a photon energy ball.
Find the “Art – Model” field which should be set to Photon Cannon Weapon.
Double-Click and change it to “Fire Medium”.This will make it so the tower shoots out fire lol. Who doesn’t like fire-breathing Dark Templars? Huh!
Next actor is the Shadow Blade Turret actor. Click on it.
Double-Click on “Event – Events+”.
Click on the first and only event (if not already selected).
Change the Source Name from Sun Shooter to be Shadow Blade.
Hit OK.
Actors are done! We are not touching the Shadow Team Building Birth actor because since we just duplicated it, it already has our Shadow Blade in its events. You will need to update it as you make more towers though (as I explained earlier for the Sun Team).
Let’s switch back to the Units tab of the Data Editor.
Click on our Shadow Blade unit.
In the Object Explorer, scroll down to the bottom and click on “Shadow Blade” under Weapons:
We need to change the attack speed, icon, and range here... since I deemed the Shadow team to be slower and shorter ranged (but higher damage of course).
Double-Click on UI-Icon...
Change it to be the following (hit Browse button, then you may have to search):
Hit OK and OK again.
Change Stats-Range field to be 5 instead of 7.
Finally, change Stats-Period to be 0.9 instead of 0.25.
Now scroll up in the Object Explorer and find “Shadow Blade Damage” under Effects.
Change “Combat-Amount” field to be 14 instead of the Sun Shooters’ 3.
That’s it for the effects and weapon.
We now need to change the cost of our Shadow Blade.
Click on the top level item in the Object Explorer:
Now, with our actual unit object selected, find the “Cost – Cost” field on the right pane.
Change it like we did with the Sun Shooter, except set the price to w/e you like. I chose 6 Minerals.
That’s it for towers! Yep, unless you want to keep making more for each race or adding new races... which you should... only two towers would be pretty lame. I will be moving on now...
... to buttons! We will make some buttons for the towers and for the builders.
Switch to the Buttons tab of the Data Editor:
Now change the Data Source to be “All Data” rather than just our maps’.
We just need to copy-paste any button from the list, in my case I copy-pasted “Barrage”.
Double-Click “Barrage Copy” and rename/suggest to be “Build Sun Shooter” and hit OK.
Switch the Data Source back to our own maps’ now... since we just need to see our copied button.
Select our new button if not already selected.
Double-Click on the “Hotkey” field.
A popup appears...Change ‘B’ to ‘S’ (or something else if you prefer) by simply clicking on the B in the box and tapping S on your keyboard.
Hit OK.
Double-Click Hotkey Alias and change it to be ‘Build Sun Shooter’.I don’t actually know what this field does but I always change it to be correct.
Now Double-Click on the Icon field.
Hit Browse.
Search for “Photon” and it should be the first one in the subsequent list.
Hit OK and OK.
Finally, Double-Click on the ‘Tooltip’ field.
You can clear out all of the old text... and then write your own description. Mine went like so:
A basic fast shooting tower for the Sun team. Does 3 damage every 0.25 seconds.
Now we are done with this button... but we need one for the Shadow Blade tower.
So Copy+Paste our newly made button and rename it to be “Build Shadow Blade”.
Hotkey can stay the same.
Fix the Hotkey Alias field to be ‘Build Shadow Blade’.
Change the Icon to be the Dark Templar one.
Tooltip can be something along the lines of “A basic short-ranged tower for the Shadow team. Does 14 damage every 0.9 seconds”.
This button is done! Let's keep going...
Copy+Paste that button, and rename to be “Build Sun Towers”.
Hotkey: change to B.
Fix Hotkey Alias again.
Icon: change to w/e you think is suitable. I chose this:
Tooltip can be “View the towers to build for the Sun Team”.
Good, now one more button to go!
Copy+Paste that last button and rename to be “Build Shadow Towers”.
Hotkey can stay the same.
Fix Hotkey Alias again.
Icon can stay the same or change if you wish.
Tooltip can be “View the towers to build for the Shadow Team”.
Buttons are all done!
Onto the builders... switch to the Units tab of the Data Editor.
Switch Data Source to All Data. Search for “Probe”.
Right-Click on one of the resulting Probes and hit Duplicate(We will be making our builder from the probe; his build method is ideal for TDs).
Choose the following checkboxes:
(Abilities) Probe – Build (Probe)
(Actors) Probe
That’s it, so hit OK(We don’t need most of the other stuff because we’ll be removing the Probe’s weapon etc...).
With our new duplicate Probe selected, scroll down in the object explorer and find the “Probe Copy” under Actors:
Double-Click and rename to be “Sun Builder” and hit OK.
Now Double-Click on the Probe unit itself (top item in the Object Explorer):
Rename to be “Sun Builder” and hit OK.
Now you will have to clear the Search field and switch Data Source back to just our map rather than All Data.
→ You should see our new Sun Builder in the list!
Click on it because it was likely deselected.
We have to finish renaming... next and last is the build ability:
In the Object Explorer under Abilities should be “Probe – Build (Probe) Copy”.
Double-Click and rename to be “Build (Sun Builder)”.
You will notice that it now says “Probe – Build (Sun Builder)”.This is because the Editor Prefix field is still set to Probe.
So click back on this ability, find the Editor Prefix field, and set it to be “Sun Builder”.
→ Now it should be “Sun Builder - Build (Sun Builder)”.
Next we will fix up the Unit itself. Click on the ‘Sun Builder’ in the Object Explorer (top item):
Now Double-Click on the first field on the right (Ability – Abilities+).We need to remove some crap:
Click on ‘Attack’ and hit the Red X.
Click on ‘Probe – Gather...’ and hit the Red X.
Click on ‘BuildObjectiveStructure...’ and hit the Red X.
Hit OK.
Next is the Ability – Command Card+ field.
With the command card window open, remove the ‘Attack’, ‘Gather’ and ‘Return Cargo’ icons. (I assume you know how to do this now... Red X button!)
Also, remove the ‘Warp in Advanced Structure’ button... since we don’t want that for the time being.
We need to fix the Warp-In button to be our ‘Build Sun Towers’ one... it’s still set to the original Protoss button right now.
Click on the button and then Double Click on this line:
In the new popup window, search for “Sun” and you should see our “Build Sun Towers” button.
Choose it and hit OK.
We still need to fix one more thing on this command card: All of the old Protoss buildings!
Change the Card to 2:
→ You will see the buttons change to be a lot of Protoss buildings.
Click on each one and hit remove (Red X button) EXCEPT for the Cancel button. We need that to go back to the main command card for the builder.
Once finished removing, hit OK.We will add in our actual ‘Build Sun Shooter’ button later when we finish the build ability.
Next field is ‘Behavior – Response’.
Change it from Flee to No Response.This step is just a precaution (probably optional).
Next, Double-Click the field ‘Combat – Weapons +’.
When the Weapons window pops up, click on the first and only row and remove it.
(Our builder has no weapons!)
Double-Click the field ‘Editor-Description’.
Remove the text.
Double-Click the field ‘Movement – Collide’.
Uncheck‘Ground’ and uncheck‘Unused (Land 09)’.
Hit OK(should be nothing checked).
Double-Click the field ‘Movement – Mover’.
Change to ‘Fly’→ (so our builder can go over buildings).
Now you can also change ‘Movement – Speed’ if you wish him to fly slower/faster around... (optional).
Scrolling down, you can set all four ‘Shield’ fields to 0 like we did with the towers.
Let’s make the Builder actually be off the ground.
Find the ‘UI – Height’ field.
Change the value to 2.0 or so.
Near the bottom, find ‘Unit – Flags’.
Open that and check-off Invulnerable.
Our builder is mostly setup now! Just need to fix his build ability to have the tower.
In the Object Explorer, click on the build ability for our Sun Builder:
Every field is fine inside the build ability except for one: ‘Ability – Info+’.
Double-Click it.
→ Here is where we specify the towers, buttons, time, etc..
Scroll the new window down to the row labeled “Build 16”. We will put our first (and only for this tutorial) Sun tower here.
Double-Click ‘Build 16’(You could use any other row or do it right overtop of previous Protoss buildings if you wanted...).
In the new popup, the first drop-down list is for the button.
Find our button: “Build Sun Shooter”.
Make sure the ‘State’ is set to Available and ‘Requirement’ says None.
Scroll all the way down to ‘Info – Unit’ drop-down.
Change it to be our “Sun Shooter”.
Set ‘Info – Time’ to 1.0 (build time of tower).
(Optional) You could also set ‘Info – Cooldown – Time Use’ which would be the cooldown between building this tower. I usually leave it at 0 for lower ranked towers because you need to maze fast.
Hit OK and OK to close both windows.
Now back in the Object Explorer pane, click back up to our actual Sun Builder unit.
→ We are going to add the Build Sun Shooter onto his command card as I mentioned we would...
Double-Click on the field ‘Ability – Command Card +’.
Switch to Command Card 2 from the drop-down.
Click on the top-left (gray) square of the card (unless you wish to put this in another spot, go ahead!).
Click the green-X button on the right now to begin adding.
In the new popup, search for “Build Sun Shooter”.
Choose the resulting button and hit OK.
Choose ‘Command Type’ drop-down to be ‘Ability Command’.
Choose ‘Ability’ drop-down to be ‘Sun Builder – Build (Sun Builder)’.
Choose ‘Ability Command’ to be ‘Build Sun Shooter’.
Hit OK.
One builder down! One to go! Shadow Builder time...
Right click the Sun Builder and hit Duplicate Unit:
Check-off only 2 things:
(Abilities) Sun Builder – Build (Sun Builder)
(Actors) Sun Builder
Hit OK.
Renaming time as usual!
In the Object Explorer, Double-Click on ‘Sun Builder Copy’ under the Actors category.
Rename to “Shadow Builder” and hit OK.
Next is the build ability: Click on “Sun Builder – Build (Sun Builder) Copy”.
Change the ‘Editor Prefix’ field to be “Shadow Builder”.
Now Double-Click the ability itself and rename from “Build (Sun Builder) Copy” to be “Build (Shadow Builder)”.
Hit OK.
Finally let’s rename the Unit.
Double-Click on the unit itself as we always do and rename it from “Sun Builder” to “Shadow Builder”.
Let’s make it so this builder can build the Shadow Blade tower!
Click on our newly renamed build ability from the Object Explorer.
Double-Click on the ‘Ability-Info+’ field similar to last time.
In the popup, scroll down to Build 16.
We’re going to replace the Sun Shooter. Double-Click on the Build 16 row.
Change the button drop-down to be ‘Build Shadow Blade’.
Scroll down and change Info-Unit to be ‘Shadow Blade’.
Rest stays the same for me...
Hit OK and OK.
Note: Once you start making more towers, here is a general procedure to follow:
Make the tower Unit itself as we did twice in this tutorial.
Make the build button in Button tab as we did a long ways back.
Add in this tower to the next available row in the builder’s build ability.
Update Command Card of builder unit with new tower-build button.
Anyway, let’s go back to the Shadow Builder unit itself.
Double-Click on ‘Ability – Command Card+’.
Click on the bottom-left button:
If the Button is ‘Build Sun Towers’, Double-Click it and change to ‘Build Shadow Towers’.
→ After changing it, make sure it’s still doing ‘Submenu’ Command-Type and going to Command Card 2.
Switch to Command Card 2 now. We’re going to put the ‘Build Shadow Blade’ button in.
Click on the top-left square (or where you prefer). You may see this bug in the button list:
It’s just a minor issue with duplication. Just hit the Red-X repeatedly until they are all removed (including ‘Build Sun Shooter’).
Now hit the Green-X.
Search for our ‘Build Shadow Blade’ button and choose it.
Choose ‘Command Type’ drop-down to be ‘Ability Command’.
Choose ‘Ability’ drop-down to be ‘Shadow Builder– Build (Shadow Builder)’.
Choose ‘Ability Command’ to be ‘Build Shadow Blade’.
Last step for this builder is to make him more like a ‘shadow’. So, in the Object Explorer, click on the actor ‘Shadow Builder’.
Change ‘UI – Unit Icon’ to be the Dark Probe one (search for probe-dark in icon browser).
Double-Click ‘Event – Events+’.
Right-Click anywhere (on the left) and add a New Event:
On the new event, change ‘Msg Type’ to be ‘Actor Creation’.
Leave Source and Sub Name drop-downs as ‘Any’.
Click on ‘Action Impact’ and change ‘Msg Type’ to be ‘Set Tint Color’.
Leave color as black and change HDR Multiplier to 2.0 to make it stronger.
Hit OK.
Now the towers and builders are done!
Time to make a few mobs! (two to be exact).
Switch to the Units tab of the Data Editor (if not already on it). We will be duplicating a Zergling.
Change the Data Source drop-down to be ‘All Data’.
Search for “Zergling”.
Right-Click one of them (I chose the one of Data Source LibertyStory) and duplicate it.
Check off only ‘Zergling’ under Actors and hit OK. We don’t need the rest since our waves won’t attack, they just need a different look and health per wave.
Double-Click the ‘Zergling Copy’ (under Actors) in the Object Explorer.
Rename to be “Weakling” (or choose a different name) and hit OK.
Double-Click the unit itself and then rename to be “Weakling” rather than 'Zergling'.
Once again, now you’ll need to clear the Search bar and switch Data Source to be just your map to see your newly duplicated unit.
Click on it once done this.
Double-Click on the field ‘Ability – Abilities+’.
Remove Attack ability
Remove Queue ability
Remove Burrow ability
Remove Morph ability
Hit OK.
We won’t touch the command card since no actual player will see it.
Double-Click on ‘Combat-Kill Resource’ and make it 1 for Minerals.This is unit bounty FYI.
Double-Click on ‘Combat – Weapons+’ and remove the one weapon.
Double-Click on ‘Editor – Description’ and delete the text.
Double-Click on ‘Movement – Radius’, make it around 0.2... just to make sure he fits in single maze lanes.
Double-Click on ‘Movement – Separation Radius’ and also make it around 0.2.
You can also turn down Speed if you like... I did a bit since this is the first wave’s mob.
Double-Click ‘Stats – Life Maximum’ and change it to 16 or w/e number if balanced for your TD.
Also do this for ‘Stats – Life Starting Amount’.
First mob done! Onto the 2nd one...
Back in the unit list, right click our Weakling and hit Duplicate Unit.
Check off only ‘Weakling’ under the Actors category (should be green colored text too) and hit OK.
In the Object Explorer, (under Actors category) rename “Weakling Copy” to be “Not so Weakling” (or w/e name you want... be creative... not like me!).
Now rename the actual unit to be “Not so Weakling” and reselect him if it deselects after hitting OK.
First, we’re going to change the actor to be like a Hydralisk. I am showing this so that for future duplications you will understand how to keep changing the model/sounds/icons etc for each wave unit.
So, click on ‘Not so Weakling’ under the Actors category (Object Explorer!).
Change ‘Art – Model’ to be Hydralisk.
Change ‘Art – Model (Build)’ to be Hydralisk.
Change ‘Art – Model (Placement)’ to be Hydralisk.
Change ‘Art – Model (Portrait)’ to be Portrait – Hydralisk.
Double-Click on ‘Combat – Custom Death+’.
Remove everything except the first 3 rows so that it looks like this:
Double-Click on ‘Combat – Death Effects’.
The first row needs to be changed mainly. Change Model to be ‘Hydralisk Death’
Change Sound to be ‘Hydralisk_Death’.
At this point you can go through the other rows that have ‘zergling’ in them (like the acid death Model) and change them to be Hydralisk Acid Death for instance (if Hydralisk has that model... it may not exist!). Otherwise set them all to ‘None’.
Double-Click on ‘Sound – Sounds’.
Change any sound that doesn’t have “Unknown” in it (or isn’t “None”) to the Hydralisk version. Eg change Zergling_Attack to Hydralisk_Attack and so forth.
Double-Click on ‘UI – Group Icon+’
Browse and change to be the wireframe for the Hydralisk:
Copy (Ctrl+C) the ‘UI - Group Icon+’ field and paste (Ctrl+V) onto the ‘UI – Wireframe+’ field... otherwise the long way is repeat the above step for ‘UI - Wireframe+’.
Double-Click ‘UI – Unit Icon’
Browse and change to be the icon for the Hydralisk:
(Optional) Copy+Paste the Unit Icon field onto the Hero Icon field. This won’t change anything since our mob is not a hero (and none will be), but it is good practice I guess...
Actor done! Now let’s adjust the Not so Weakling unit itself.
Click on it at the top of the Object Explorer as usual...
You can adjust Movement-Speed to be higher if you wish...
Then, make sure to adjust ‘Stats-Life Maximum’ and ‘Stats-Life Staring Amount’.
I set them to 25 for this wave (wave 2).
You could also adjust ‘Stats – Life Armor’ if you wanted waves to have more armor over time...
Yay! We are now done with mobs! You could go and duplicate more if you wish... but perhaps wait until the tutorial is over...
Last chunk of the Data Editor for us will be making the tower-sell ability. The Data-side of the ability will just kill the tower... and then through Triggers (later!) we will reward the 50% sell value or w/e amount.
Switch to the Abilities tab of the Data Editor.
Switch Data Source to All Data, and search for “salvage”.
Right-Click on one ‘Salvage – Bunker (Refund)’ ability and Duplicate it.
Check off the button and the effect in the subsequent window and hit OK.
Click on the effect in the Object Explorer
Clear its Editor-Prefix.
Rename the effect itself to be “Sell Death”.
Click on the button in the Object Explorer.
Rename the button to be “Sell Tower”.
Now rename the ability itself to be “Sell Tower”.
You will now also have to clear the Editor-Prefix field so ‘Salvage’ goes away.
Let’s start with the Button (click back to it):
Change Hotkey to be Q or w/e works for you.
You can change the Icon if you wish.
Change Tooltip to be: “Sells this tower for 50% of its value”.
Button is done!
As for the effect, we don’t have to change anything in it so in actuality we probably did not have to duplicate/check-it-off. But just in case Blizz changes something on the default “salvage death” we won’t be affected.
In the ability itself, we need to fix the ‘Cost – Cost+’ field. → It actually costs (by default) negative 75 minerals. This means that it gives the player 75 minerals when they use the ability. We do not want this ‘hard amount’ because we want 50% of the tower value... so we will set it to 0 and do the refunding through Triggers later (as I mentioned).
To do this, Double-Click on the ‘Cost-Cost+’ field.
In the popup window, click on the one and only row at the top.
Now scroll down and find the Technology Resource Cost values.
Change Minerals from -75 to 0:
Now we will add this ability to our towers.
Switch back to the Units tab of the Data Editor (and clear search, set Data Source to your map).
Click on our Sun Shooter first.
Double-Click on the first field ‘Ability – Abilities+’.
In the popup window, hit the Green-X.
Change this newly added ability to be ‘Sell Tower (Refund)’.
Now Double-Click on ‘Ability – Command Card+’.
Find a good spot (ie top left square) to put our sell button.
Hit the Green-X, search for our “Sell Tower” button and choose it.
Change Command Type to be Ability Command.
Change Ability to be ‘Sell Tower (Refund)’.
Finally, make sure Ability Command is on “Sell Tower”.
Hit OK.
Now both towers have a working ‘Sell’ option, but it won’t give any money back until later...
WOOOOOOOOOOOOO!!! Data is done!!!! We can finally move onto triggers!!!! I’ll calm down now...
PART 3 - TRIGGERS
Triggers will control the logic, waves, timing, leaderboard, alliances, etc... very important! They are also very straightforward, and likely more enjoyable than Data editing.
I will explain steps in detail that are confusing or if we are doing them for the first time. Other than that though, I will try to keep it moving quickly.
So, time to switch to the Trigger Editor. Click the ‘gears’ button from the Data Editor or Terrain Editor:
The trigger window will pop up with the Melee Initialization trigger selected. This just does the default actions for setting up a Melee game:
Brief explanation of triggers:
The left pane contains your triggers (events/actions) and your variables (method of storing values). Right now there is only one trigger and no variables (we will be making quite a few of these).
The right and main pane shows your current selected trigger (or variable). It’s quite simple: when the event occurs, it will check any conditions and then perform the actions in order. In this case there are no conditions (wouldn’t even make sense to have any here).
Well, we still want to do other stuff when the game is loaded so let’s keep the trigger... BUT let’s clear out the melee actions.
Delete all 4 of them; it should look like this now:
We will be initializing/creating the race choosing dialog first:
Click on 'Actions' as in the image above the previous one.
Hit Ctrl+W to add a new action (you can also right click and add new action).
Choose the Dialog category and then the action ‘Create Dialog’.
With the new action up, we need to change some values: mainly just the size of (500,400).
Change 500 & 400 to be 400 & 300 respectively. (Click on each one and punch in the number and hit OK... fairly simple!)
→ By the way, if you cannot see a pane like in the image just below, you may need to drag the bar up...
(I have worked out these numbers already... you can change later as you add more races).
Anchoring to the center is fairly obvious, and we want no offset...
Modal means it locks out other interface elements but this does not work currently so leave it.
This is great and all but there’s one issue: we will need to reference this dialog later when the user chooses a race (we have to hide the dialog window). Yet, we have no way to reference it from that (soon to be made) other trigger... unless... we store this dialog in a variable! Follow me on this one...
Right-Click on the left pane and add a new variable:
Name it “Race Dialog”.
Now change its type to be ‘Dialog’:
Then, go back into Melee Initialization.Note: You could/should rename Melee Initialization to be just “Initialization” (right-click to rename).
Now click on our Dialog action that’s already there and then hit Ctrl+W(so that our new action goes below the Dialog one).
From the popup window, choose the Variable category and then choose ‘Variable – Set Variable’.
Now you should see:
Click on the “Variable” and in the popup, choose our “Race Dialog”.
Click on Value and change it to the Function radial option.
Then, choose ‘Last Created Dialog’:
Hit OK.This is how variables are set. You first make the object such as Dialog, and then store it right after.
So now for the rest of the game we have a way to easily reference this dialog if need be!
Next, click on our newly made action if not already on it, and hit Ctrl+W to add a new action.
Choose the Dialog category and then the action ‘Create Dialog Item (Button)’.
We are making the Choose Sun Team button.Note: Because Dialog Buttons cannot have images on them, we are going to fake it by having this button and then a Dialog Image placed over top of it... anyway...
For this new action, set the following:
Dimensions to be (130,130)
Anchored to (Left)
Offset of (50,0)
Tooltip to:
Choose Sun Team This team is adept at fast shots and long range.
Button text to nothing (appears as “”)
Notes:
We could change (Last Created Dialog) to be our “Race Dialog” variable but since we’re still in the same trigger as when we made the Dialog, we don’t have to.
Anchoring to ‘Left’ means the center of the left wall of our dialog.
Offset of 50 in X means positive 50 points away from the left wall.
Button text is blank because we’re faking an image over the button.
Now, this newly made Dialog Item Button needs to be stored in a variable too because later we need to know what button the player pressed (go with me on this one).
So, right-click in the left pane and add a new variable as we did before.
Name it “Choose Sun Team Button”.
Change its type to be ‘Dialog Item’.
While we’re here, (thinking ahead) why don’t you copy-paste our newly made Dialog Item variable and rename it to be “Choose Shadow Team Button”. Then head back into our Initialization trigger...
Click on our last action in there and then hit Ctrl+W to make another new action.
Choose the Variable category and then Set Variable.
→ Change the Variable to be ‘Choose Sun Team Button’.
→ Click on Value, change to the Function radial button, and then choose ‘Last Created Dialog Item’.
Let’s copy+paste for the Shadow team’s button. Select the last 2 actions like so:
Hit Ctrl+C and then Ctrl+V to copy & paste.
For the newly copied button action:
Change anchor to be Right instead of Left.
Offset can stay the same since it will now offset 50 points to the left of the right-wall.
Tooltip needs to be something like:
Choose Shadow Team This team is adept at close range and high damages.
Now change the 2nd action we copied to be like this:
Choose Shadow Team Button = Last Created Dialog Item. Here is a picture of it all:
We need to add the images on top of each button now...
So, click on the last action (as in the image above), hit Ctrl+W.
Choose the new action to be of the Dialog category: ‘Create Dialog Item (Image)’.
For this new action, set:
Dimensions to be (130,130)
Anchored to (Left)
Offset of (50,0)
No tooltip
Image is the Probe Icon (full name is ‘btn-unit-protoss-probe.dds’)
Tiled set to false so it stretches
Rest is fine
Basically this image sits right on top of our Choose Sun Team button.
Copy+Paste that last action and change these values:
Anchored to (Right)
Image is the Dark Probe Icon (full name is ‘btn-unit-protoss-probe-dark.dds’)
Our trigger should look like this now:
Next we need to set the Dialog title.
So click on our last image action and then hit Ctrl+W again.
→ Choose the Dialog category and then choose the action: ‘Set Dialog Title’.
→ Click on Title and type in “Choose your Race” and hit OK.
Lastly for this dialog, we simply need to show it! So click on our last ‘set title’ action and then hit Ctrl+W again.
Choose the Dialog category and then choose: ‘Show/Hide Dialog’.
→ Change Hide to be Show.
→ Change All Players to be Active Players.
We are done with the dialog setup now (but not done with this trigger)... let’s put a break-line before our next actions in this trigger... by break-line I mean simply add a new comment and punch some dashes in it:
Right-Click on our last ‘Show Dialog’ action and choose New->New Comment.
In the comment box, rather than have “Comment”, just delete that and punch in 5-10 dashes or w/e you like. This just helps us have visual breaks between groups of actions. You could also use comments for notes to yourself etc...
We are going to initialize the waves now. Basically, we will have a ‘wave counter’ starting from 0. Each wave (every 30s) we increase the counter by 1 which changes what (and how much) spawns. Overview:
We have two lists: one list is the list of unit types (Wave Types), and the other is the list of how many to spawn of that unit (Wave Counts). In the programming world, a list is called an ‘array’ FYI, and they start counting from 0.
‘Wave Types[0]’ is set to 'Weakling'. ‘Wave Counts[0]’ is set to 15.
‘Wave Types[1]’ is set to 'Not so Weakling'. ‘Wave Counts[1]’ is set to 15 as well.
So, initially our counter is 0 and so it would spawn 15 'Weaklings' and then set counter +1.
Then, 30s later, it would spawn 15 'Not so Weaklings' and then set counter +1.
Repeats until last wave...
Actual Implementation:
Right-Click on the left pane and choose New->New Variable.
Name it “Wave Types”.
Make its Type as ‘Unit Type’.
Check off Array and choose a size of 40. (You may notice I added a comment-line above this variable just for visual separation... you can too...)
I chose 40 just to account for the future... assuming you had 40 waves. You could set this to 2 but every time you added more waves you’d have to increase this number.
Like I mentioned above, by checking array (and size of 40) it means we essentially have a list of 40 ‘Unit Type’ variables in this.
Now copy+paste this variable.
Change the name to be “Wave Counts”.
Change Type to be “Integer” (Integers are just a whole number).
(Leave Array checked)
We still need 2 more variables to make our waves work:
Right-Click and go New->New Variable.
Name is “Current Wave Iteration”.
Type is Integer (should be default anyway). This variable should be fairly obvious: it will keep track of what wave number the players are on as the game progresses.
Copy+Paste this ^ variable and rename to be “Number of Waves”.
Click on (and change) its initial value from 0 to 2 since we only made 2 types of waves.
NOTE: if you cannot see the initial value of 0, you may need to drag the bottom bar up:
(In this case I already had it high enough to see the number).→ Anyway, I didn’t explain this variable yet... its purpose is simply to let us know how many of our waves we’ve actually made (since we certainly haven’t made 40 types yet). You will have to increase this as you make more mobs in the data editor.
At the end you should have these 4 new variables:
Now click back to our Initialization Trigger.
Click on our last little Comment line.
Hit Ctrl+W to make a new action.
Choose Variable as the category and then choose ‘Set Variable’.
→ Click on Variable and choose ‘Wave Types’ from the list.
→ Click on Value and search for Weakling in the popup. Choose our Weakling unit type.
Copy+Paste that action ^ and then click on the [0] and change it to [1].
→ Click on Weakling and change it to Not so Weakling (may have to search).
Now hit Ctrl+W again, choose Variable and ‘Set Variable’.
→ Click on Variable and choose ‘Wave Counts’ from the list.
→ Click on Value and type in 12 (or w/e number you want for the first wave).
Copy+Paste that action ^ and change [0] to [1] again.
→ Click on the 12 and change it to 14 (or you could keep it the same if you like etc...).
And that’s about it for the waves. You can rearrange your actions to look like mine if you like: → And a small note: If you made a boss unit for say, the 10th wave, you could just set the Wave Counts[9] to = 1
Next, add another comment-break line in our actions.
Now we will make the Timer and the Timer Window (for the waves).
→ I’m going to assume you're getting more adept with variables and actions so I will streamline tasks we have already done... I'll try and show helpful images though
Please make these variables:
(Not actually a variable) Put a comment line first... (once again for visual separation for our new variables)
“Timer” of type Timer.
“Timer Window” of type Timer Window.
Back in Initialization, we need these new actions (at the bottom):
(Not actually an action) Put a comment line first...
(Timer) Start Timer.
Click on Timer and make sure it’s set to our variable (Should be).
Change 5.0 to 30.0
(Timer) Create Timer Window.
Change Title to be “Wave Begins:”
(Variable) Set Variable.
Make it set variable ‘Timer Window’ to be equal to ‘Last created timer window’ (under Function radial button).
(Timer) Show/Hide Timer Window.
Change ‘Hide’ to ‘Show’.
Change (All Players) to (Active Players).
(These actions are fairly obvious I think...)
Onto some player setup actions now... we will use a simple loop to repeat actions for each player (rather than have to punch out the same 3-4 actions manually for all players).
Make these actions (still at bottom of Initialization trigger):
(Not an action) Add another comment line.
(Player Group) Pick Each Player in Player Group.
Change (All Players) to be (Active Players).
Now click on ‘Actions’ underneath ^ as shown below:
→ Ctrl+W now will make an action within this ‘pick each player’ loop.
So hit Ctrl+W and choose (Camera) Pan Camera. FYI (obvious) this will pan the camera for players at the start...
Click on the first value which should be “1”. Change it to the Function radial button. Then choose Picked Player from the huge list:
(By choosing Picked Player, we are referring to the current player of the loop... so our “Player Group – Pick each player in (Active Players)” line means that any actions inside it will run for all active players... Eg. starting with player 1, then 2, and so on).
Click on ‘Triggering region’ and change it to ‘Playable map area’.
Click on 2.0 and change it to 0.0 (we want instant pan to center!)
That’s it! The rest of the values can be ignored here since we’re using 0.0 seconds.
Next action within our loop is (Visibility) Create Revealer.
Change the ‘1’ to be ‘Picked Player’ (change to Function radial button to find Picked Player).
Change Area to be Playable Map Area (change to Function radial button to find Playable Map Area).
Last action in our loop: (Player) Modify Player Property.
Click on ‘0’ and change to be ‘Picked Player’ as usual...
Click on “1000” and change it to “30” or w/e you deem fair as starting resources.
Should look like this now:
Up next are the player alliances! The simplest way (I find) is to make everyone an enemy and then re-ally the teams.
→ Make sure your next actions ARE NOT in the ‘pick each player’ loop. If you click on the line as shown in the image below, then hit new comment or new action, it’ll make it AFTER the loop (what we want) rather than inside it (what we don’t want). (See ^ the last comment line is not inside the loop...)
Anyway, actions to add:
Comment line of course
(Player) Set Alliance for Player Group
Change Player Group to be Active Players (under Function radial)
Change Ally with Shared Vision to be just ‘Enemy’
(Player) Set Alliance
Leave everything... defaults are exactly what we want somehow lol.
(Player) Set Alliance
Make it be between players 3 and 4 (rather than 1 and 2 default).
(Player) Set Alliance
Make it be between players 3 and 6
Change it from Ally with Shared Vision to just ‘Neutral’
(Player 6 is our mob spawning player on the left side... neutral to the right side players!)
(Player) Set Alliance
Make it be between players 4 and 6
Change it from Ally with Shared Vision to just ‘Neutral’
(Player) Set Alliance
Make it be between players 1 and 5
Change it from Ally with Shared Vision to just ‘Neutral’
(Player 5 is our mob spawning player on the right side... neutral to the left players!)
(Player) Set Alliance
Make it be between players 2 and 5
Change it from Ally with Shared Vision to just ‘Neutral’
Next we are going to do some leg-work for when our builders spawn. Follow these steps and then I’ll explain it...
First make a comment-line as usual under our variables on the left pane.
Then, make a new variable:
Name it “Player Spawn Points”
Type is ‘Point’
Check Array and make it size ‘4’.
Now back in the Initialization trigger, add these actions:
(Not an action) Comment-line as usual
(Variable) Set Variable.
Change Variable to be our Player Spawn Points variable
Change [0 ]to be [1]
Change Value to be ‘Point 001’
Copy+Paste that ^ action.
Change [1] to [2]
Change ‘Point 001’ to be ‘Point 002’
Copy+Paste again.
Change [2] to [3]
Change ‘Point 002’ to be ‘Point 003’
Copy+Paste again.
Change [3] to [4]
Change ‘Point 003’ to be ‘Point 004’
Final: (Essentially what we want to have happen is later when player 1 clicks a choice in the Race Dialog, it’ll make that builder for him at his spawn point. Same goes for players 2-4. The long way of dealing with it is saying: “If player 1 chose his race, spawn at point 001, else if player 2 chose his race, spawn at point 002, and so on...” However, like we did with the waves, we can use an array (aka a list) to do this spawning a lot easier. You’ll see later...
Lastly in our Initialization trigger is the Leaderboard!
This is going to be some grunt work so get ready...
First, add a comment-line at the bottom of our trigger as usual.
Next, add the following action:
(Leaderboard) Create Leaderboard.
Change rows to be 7 rather than 2 (7 rows accounts for 4 players, left/right lives, and break-line)
Change the name ‘Text’ to be “Versus TD” or w/e you prefer
Change the color if you wish
Now back on the left pane, we need to add a new comment-line and then a new variable:
Name the variable “Leaderboard”
Type is Leaderboard
We need this leaderboard variable because later (in several triggers) we will be referencing it...
Next, scurry on back to our Initialization trigger and add a new action at the bottom:
(Variable) Set Variable.
Change ‘Variable’ to be ‘Leaderboard’
Change the Value to be Last created leaderboard (under Function)
Now keep going... add these actions:
(Leaderboard) Set Leaderboard Item Text.
Change row from 1 to Header (under Presets)
Change Text to be “Player”
(Leaderboard) Set Leaderboard Item Text.
Change Column from 1 to 2.
Change row from 1 to Header (under Presets)
Change Text to be “Kills”
Next we are going to check if player 1 is active and if so we will set his name etc... Otherwise we’ll set his leaderboard row to ‘not playing’.
It will look like so:
So, let’s recreate this ^ set of actions.
The main action is (General) If Then Else.
→ Ctrl+W below our last action and create an ‘If Then Else’ action.
Click on the ‘If’. Hit Ctrl+W and it’ll bring up a list of Condition types. Hit OK since by default it’s on Comparison and that’s what we want.
Click on the left-most bracket of “(Owner of Triggering Unit...” This should bring up a list of comparisons:
Choose Status of Player and hit OK.
Click on Value 2. Change to the Preset radial button. Choose ‘Playing’.
Now let’s move onto the ‘Then’ block where we will do the actions for when this player is active...
Simply click on ‘Then’:
Hit Ctrl+W and choose the action ‘Set Leaderboard Item Text’ under the Leaderboard category.
Change the ‘Text’ to be Name of Player (under Function radial):
It’ll default to Name of Player (Triggering Player). We don’t want this... so click on (Triggering Player).
Switch it to the Value radial button, type in 1, and hit OK.
Ctrl+W and choose ‘Set Leaderboard Item Text Color’ under the Leaderboard category.
We need to change the color to be player 1’s color, so click on (100%,100%,100%). Change from the Value radial to the Function radial. Choose ‘Convert Player Color to Color’ and hit OK.
It’s still not right though; click on (Triggering Player) and change to the Value radial button. Type in ‘1’ for Value and hit OK.
Ctrl+W and choose ‘Set Leaderboard Item Text’ under the Leaderboard category.
Change the Column to 2.
Change Text to be “0”... since player kills will be 0 at the start...
Ctrl+W and choose ‘Set Leaderboard Item Text Color’ under the Leaderboard category.
First change the Column to 2.
Then again we need to change the color to be player 1’s color here, so click on (100%,100%,100%). Change from the Value radial to the Function radial. Choose ‘Convert Player Color to Color’ and hit OK.
Fix it again: click on (Triggering Player) and change to the Value radial button. Type in ‘1’ for Value and hit OK.
(Note: You could have copy-pasted our previous ‘set item text color’ action and just changed the Column... saves time... I’m just doing it rigorously just for the tutorial).
Finally let’s move onto the ‘Else’ block, where we will deal with the player not being active... so to save us time, we will do some copy pasting!
Shift+Select these 2 actions from the ‘Then’ block:
Hit Ctrl+C to copy.
Click on the ‘Else’
Hit Ctrl+V to paste.
Select the first of the newly pasted actions
Click on the left bracket of “(Name of Player 1)”:
→ In the popup window, switch to the Value radial button. Then just type in “Not Playing” and hit OK.
Now click on the next action (the set color one).
Click on the left-most bracket of “(Color((Current player 1 Color)))”.
Switch to the Value radial button. Click on the black color swatch. Choose a mid-gray color and hit OK, and hit OK again.
Player 1 is now taken care of on our leaderboard. However, before we begin adding the leaderboard-setup actions for players 2-4 (and lives), we’re going to add a variable and a line that’ll tell us whether the left side has at least one player (and same for right side).
Go with me on this one!
Back on the left pane, add 2 new variables:
“Left Has Player(s)” of type Boolean.
“Right Has Player(s)” of type Boolean. We will use these variables to control wave spawning (ie if no right-side players are present, we just spawn for the left side and vice versa).
Back to the Initialization trigger:
Scroll down to our If-Then-Else and click on the ‘Then’.
Hit Ctrl+W and make the action Set Variable (under the Variable category).
Click on Variable and change it to be ‘Left Has Player(s)’.
Click on Value and check-off the True box.
It should look like this now:
(Thus if player 1 is in the game (active) then we do indeed have at least one player on the left)
That’s all we need to do for player 1!
Let’s Copy+Paste our ‘If Then Else’ and change it up for player 2:
Click this line and hit Ctrl+C:
With that line still selected, hit Ctrl+V to paste.
It should now look like this (a duplicate ‘If Then Else’ below):
Let’s fix it up!
Click on our new duplicate “(Status of player 1) == Playing”. Change the 1 to be 2.
The ‘Variable – set left has...’ action is fine... but we need to fix up the next 6 Leaderboard actions... so match them to this image which is correct/finished:
(Basically just changing the Row number from 1 to 2, and player 1 to player 2 for three of the actions)
Up next is the ‘left lives’ and the marker-line on the leaderboard:
Click on our last If-Then-Else ‘header’ action as in the image below:
Now hit Ctrl+W and choose the Leaderboard category and the action “Set Leaderboard Item Text Color”.
It should appear below like this:
(I am being very thorough/careful to explain to you where to put the actions. It’s easy to make a mistake... if this ^ action was accidentally inside the ‘Else’ block (rather than outside it)... there would be a very incorrect leaderboard lol. So when I mention to put an action AFTER an ‘If-Then-Else’, this ^ is what I mean.)
Anyway, change row from 1 to 3.
As for the Text, we will need to do a function to combine “Left Lives” and the actual lives the left-side players have. So, follow these steps:
Click on Text.
Change from Value radial to the Function radial button.
Choose String category, and then choose ‘Combine Text’.
Click on ‘Text 1’ and type in “Left Lives: “ (Notice the space after the colon).
→ Before we click on Text 2, we need to quickly make a “Lives” variable for the left/right side. This will keep track of the lives left as the game progresses.
SO, back on the left pane, add 2 new variables:
“Left Lives” of type Integer and initially 30.
“Right Lives” of type Integer and initially 30.
Now go back into the Initialization trigger and scroll down to our last leaderboard action (click it)...
Click on ‘Text 2’ and change it to be a Function of ‘Convert Integer to Text’ and hit OK.
Click on the 0 and change it to be Variable (radial button) and then choose Left Lives. Hit OK.
It should finally look like this:
Thus, when the leaderboard is made, it will say ‘Left Lives: 30’ on the 3rd row.
New action now (Ctrl+W), and choose (under Leaderboard) Set Leaderboard Item Text.
Change row to be 4.
Change Text to be just a bunch of dashes (ie ---).
Now onto player 3 and 4 in the leaderboard...
Copy (Ctrl+C) the big ‘If Then Else’ from Player 2
Paste (Ctrl+V) below our last leaderboard action. It should look like this now:
Again, we have to fix it up!
On the “(Status of player...” line, change 2 to 3.
Click on the ‘Variable – Set Left Has Player...’ line. Now change ‘Left Has Player(s)’ to be ‘Right Has Player(s)’.
Set row to 5 for all six leaderboard actions.
Set player to 3 for those actions that require it (three do).
Check that it looks like this:
Now time for player 4! As in the image above, select that ‘General – if (Conditions) then...’ and hit Ctrl+C and Ctrl+V so you have a duplicate once again.
On the “(Status of player...” line, change 3 to 4.
Set row to 6 for all six leaderboard actions.
Set player to 4 for those actions that require it (three do).
Check that it looks like this:
Finally we just need the Right Lives row and then we’re done with Initialization...
The easiest way is to copy our ‘left lives’ action and paste it below the last ‘If Then Else’. So, let’s do that... Copy ^ that line. Paste it below player 4’s ‘If Then Else’ like so:
Now change row to 7.
Click on the “Left Lives: “ text and type in “Right Lives: “ and hit OK.
Click on the other ‘Left Lives’ now and change it to the ‘Right Lives’ variable.
Done... that’s it for the Initialization!
Onto dealing with race-choosing now...
Right-Click on the left pane (where we usually add new variables) and instead go New->New Trigger.
Name it “Race Chosen”.
I positioned my new trigger right under our Initialization trigger like so: (But you can order your triggers/variables however you want).
With that new trigger selected, you should see a very barren right-side...
Cick on Events.
Now hit Ctrl+W to add a new event.
Choose the Dialog category and then choose ‘Dialog Item is Used’.
We can leave the settings for this event as default...
Here is a final preview of how our Race Chosen trigger will look: Basic idea is to hide the dialog for the clicking player (aka triggering player). Then if they clicked the sun button, we create a sun builder... same check for shadow button... then after making the builder we pan the camera and select the builder. Simple as that.
Make these actions:
Show/Hide Dialog
Change it to be for our Race Dialog variable.
Change All Players to be Convert Player to Player Group (under Functions).
Then change the ‘1’ to be Triggering Player (under Functions).
If Then Else
In the ‘If’, add a new Condition (Comparison is the type).
Change the condition to be ‘Used Dialog Item’ (I’ll explain this one last time in case you need help: To change the condition, click on the left-most bracket of “(Owner of Triggering Unit...” and then you’ll have the list...).
Change the value to be our ‘Choose Sun Team Button’ variable.
In the ‘Then’ block, add a new Action: ‘Create Units Facing Angle’.
Change Unit to be Sun Builder.
Change player ‘1’ to be player ‘Triggering Player’ (under Function radial button).
Change Point to be Player Spawn Points variable (under Variable radial button).
Now change the [0] after ^ to be ‘Triggering Player’ (under Function radial...).
(Brief explanation: Say player 3 pressed the sun team dialog button. This trigger would execute and it would go into the ‘then’ block since our ‘if’ condition passed. It would then create the sun builder at “Player Spawn Points[3]” since triggering player would be 3 (for player 3). As we know from earlier, we set Player Spawn Points[3] to be = to Point 003.)
Leave the ‘Else’ block empty.
Now Copy the big ‘If Then Else’ we just made, and paste it fully below.
In the ‘If’ part, change “Choose Sun Team Button” to be “Choose Shadow Team Button”.
In the ‘Then’ part, change “Sun Builder” to instead be “Shadow Builder”.
This ‘If Then Else’ is done now.
Make a new action below our last ‘If Then Else’: this action will be ‘Pan Camera’.
Change player ‘1’ to be player ‘Triggering Player’ (under Function..)
Click on the left-most bracket of “(Center of (Triggering Region))” and change it from Function to Variable radial button. Choose our Player Spawn Points variable and hit OK.
Change the [0] on ^ to be Triggering Player (under Function..)
Perhaps change 2.0 seconds to be 1.0 seconds... up to you...
Next new action is ‘Select Unit’ under Unit Selection category.
Change player ‘1’ to be ‘Triggering Player” (under Function..)
Race choosing trigger is done! I hope it makes sense... by all means watch this part in the video if you wish for a more hands on explanation.
Now we will be making the repeated wave-spawning trigger. Our premise is that every 30s the next wave comes... pretty intense eh!?!?
Anyway, add a new trigger as we did for Race Choosing, except call this one “Spawn Waves”.
Add a new event for this trigger ^ called ‘Timer Expires’.
Click on Timer and in the popup make sure our Timer variable is chosen and hit OK.
Then, we will be making these actions: Quite long eh? In actuality, it’s not that complex:
First is just a new wave message and a sound.
Second is we add some minerals based on current wave number.
Next we check if the left side has at least one player and if so, spawn the correct wave amount/type and then order wave to move.
Same for the right side ^
Then restart the timer to expire in another 30s
Finally we check if we are on the last wave and if so we loop it forever. Eg since we only made 2 wave types (weakling and not so weakling) we want the 2nd wave to repeat infinitely rather than end the game or crash etc... and as you make more wave units this will automatically account for that.
So, let’s make the actions!
The first action to make is ‘Text Message’ under the UI category. I will explain how I strung together so many things (very valuable info!)
Click on Message. Change it to the Function radial button. Then Choose ‘Combine Text Multiple’ and hit OK.
Click on the red “Text” and then in the popup, type in “Wave “ and hit OK. Notice the space after “Wave”.
Now to add more text strung onto that ^ one, you’ll need to Right-Click on “Text <Text+>” in the middle pane as shown in this image
Choose New Parameter as I am doing.
In the subsequent popup, switch to Function radial, and choose ‘Convert Integer to Text’ and hit OK.
Click on the new ‘0’ and change to the Function radial and choose ‘Arithmetic (Integer)’ the under Math category.
Now change ‘Value 1’ to be ‘Current Wave Iteration’ (under the Variable radial).
You should see it like this now:
(We added +1 to the wave iteration because it starts from 0, so players would find it weird if the game said “Wave 0”... instead the user will see “Wave 1” although in reality for us it’s starting counting from 0.)
We need to add some more things onto this message (the wave unit type, ie Weakling!)...
Once again in the middle window Right-Click on Text <Text+> and add a New Parameter.
In the popup, just type in a colon and a space “: ” and hit OK.
Again add a New Parameter to the <Text+> thing.
In the popup, choose the Function radial, and choose ‘Name of Unit Type’ and hit OK.
Now click on the left-most bracket of this: “(Unit type of (Triggering Unit))” and in the popup, change it to the Variable radial. Choose our ‘Wave Types’ variable and hit OK.
Change the [0] to be Current Wave Iteration (under Variable radial).
We are done with the message, it should look like this:
(It will display “Wave “ then the wave number, then “: “, and then finally the name of our current wave type. All in all it will look like “Wave 1: Weakling”.
Now, add a new action: ‘Play Sound’ under Sound category.
Click on ‘Sound Link’ and change it to w/e you think is good for a wave spawning sound. I chose UI_TipSelect(1) which is pretty blah lol...
Next is the player mineral bonus, so add a new action: ‘Pick Each Player in Player Group’.
Change (All Players) to be (Active Players).
Inside the ‘Actions’, add a new action: ‘Modify Player Property’.
Change 0 to be Picked Player (under Function radial)
Change ‘Set To’ to be ‘Add’
Click on 1000 and change it to the Function radial. Choose Arithmetic (Integer).
Change Value 1 to be Current Wave Iteration (under Variable).
Change the plus ‘+’ symbol to be the multiplication one ‘*’.
Change the ‘1’ to be ‘4’.Thus, players will get 4 times the current wave in minerals (ie they will get 0 minerals on wave 0, 4 minerals on wave 1, and so on). You can balance this however you like.
Make a new action after our ‘Pick Each Player...’ action... an ‘If Then Else’ action.
Click on ‘If’ and add a condition (Comparison one as usual)
Change the condition (remember how!?) to be (under the Variable radial) our ‘Left Has Player(s)’ variable. Hit OK.
Click on Value 2 and check off True and hit OK.
Click on ‘Then’ now. Add a new action: ‘Create Units Facing Angle’.
Click on ‘1’ (after “Create”). Change it to Variable and choose ‘Wave Counts’ and hit OK.
Change the [0] to be Current Wave Iteration (under Variable).
Click on ‘Unit’ now and change it to Variable, choosing ‘Wave Types’ and hit OK.
Change the [0] to be Current Wave Iteration (under Variable).
Change player ‘1’ to be ‘6’. Since these are the left-side spawns, they will be owned by player 6.
Click on ‘Point’and choose Point 005 and hit OK.Now we will order that last created wave ^ to move to their end region... only one issue... we need to check the wave size whether it’s 1 (ie boss) or greater than 1 (normal wave). This is because ordering one unit is different than ordering a group. Follow me on this one...
After our last ‘create unit’ action, add a new action (still in the ‘Then’ block). Choose the action ‘If Then Else’.
In the ‘If’ block, add a new condition of type Comparison. Then, change it to be checking our variable ‘Wave Counts’ rather than ‘Owner of Triggering Unit...’
Change [0] to be Current Wave Iteration as we always do...
“== 1” can stay the same...
In the ‘Then’ block, add a new action: ‘Issue Order’ (under Unit category).
Change Triggering Unit to be Last Created Unit.
(IMPORTANT) Click on the left bracket of ‘(Ability Command)’ to change it to ‘Order Targeting Point’ and hit OK.
Now you can change Ability Command to be Move. Search for Move in the popup and choose the one with Move as both the Command and the Ability. Hit OK.
Change ‘Target Point’ to be a Function... ‘Center of Region’.
Click on ‘Region’ and choose Region 001.
In the ‘Else’ block now, add a new action. Choose ‘Issue Order to Unit Group’ (from the Unit category as well).
Change Unit Group to be ‘Last Created Units’ under Function.
Change Ability Command to be ‘Order Targeting Point’ (you remember how, right?).
Now click on Ability Command and choose the same Move as before.
Change ‘Target Point’ to be a Function... ‘Center of Region’.
Click on ‘Region’ and choose Region 001 again.
Now select the outer-most If-Then-Else like so:
Copy (Ctrl+C) and Paste (Ctrl+V) it so you have a big duplicate below it. Now scroll down to our duplicate...
Change ‘Left Has Player(s)’ under the ‘If’ block to be ‘Right Has Player(s)’
In the unit-creation action (first action in the ‘Then’ block):
Change the player from 6 to 5.
As well, change Point 005 to Point 006.
Now in the deeper-level ‘If Then Else’, we need to fix the actions under the Then and Else blocks.
Change ‘Region 001’ to be ‘Region 001 Copy’ for both actions.
Now make a new action completely BELOW the last big ‘If Then Else’. This action will be ‘Start Timer’ from the Timer category... the last part of our trigger should now look like this:
Continuing on with our Timer action:
Click on ‘Timer’ and click our Timer variable and hit OK.
Change 5.0 to 30.0
Add a new action below again, this time ‘Set Title for Timer Window’.
Click on ‘Last Created Timer Window’ and change it to the Variable radial button, then choose our Timer Window and hit OK(This is why variables come in handy, we can easily reference our timer window from Initialization from this trigger... otherwise we would have no way to).
Click on ‘Title’ and type in “Next Wave In:”
Add a new action: ‘Modify Variable (Integer) under Variable category.
Change Variable to be ‘Current Wave Iteration’.
Leave the +1, that’s exactly what we want.
→ We’re basically done for this trigger! Now it’ll increase our wave-counter variable by 1 each time. One problem though is that our game will have errors when we reach wave 3. This trigger will run with ‘Current Wave Iteration’ set to ‘2’ (aka wave 3) and it’ll try and find ‘Wave Types[2]’ which doesn’t exist and BAM error. We need to fix this... I mean, yeah, you will have way more wave units made later on... but eventually the game will progress to that cap and error out then too.
→ Solution? We check if we’re on the last known wave and if so, don’t increase the wave counter. So when we hit wave 2, instead of setting the next wave to 3, it leaves the next wave to be still 2, thus infinitely repeating.
So, add a new ‘If Then Else’ action BEFORE our last action. Should look like so:
Add a Comparison condition in the ‘If’ as usual.
Change the condition to be Current Wave Iteration. (under the Variable radial)
Change ‘==’ to be ‘<’
Change ‘1’ to be a Function. Choose Arithmetic (Integer).
Change Value 1 to be a Variable. Choose ‘Number of Waves’.
Change plus ‘+’ to be a minus ‘-‘
You can leave the last ‘1’.
Now drag our ‘Variable – Modify Current Wave...’ action into the ‘Then’ block like so: → Now your entire trigger should resemble our ‘goal’ image I showed earlier!
→ Do you understand what this ‘if statement’ does? Simply, if (the current wave) is less than (the number of waves minus 1), we go ahead and increase the wave count... otherwise we do nothing. Therefore (example) if we were on wave 0 (the first wave), it would check if: 0 < (2-1), which is 0 < 1 which is yes and thus increase current wave iteration by 1. However, if we were on wave 1 (the second wave), it would check if: 1 < (2-1), which is 1 < 1 which is not true and thus the current wave iteration stays at 1... A different solution could be to just end the game if we are on the last wave and declare the side with more lives as the victor. I won’t be showing this though.
This trigger is done! We’re about 65% done with total triggers!!
The next trigger is to check when a wave unit dies and then update the Leaderboard’s player kills.
Add a new Trigger on the left pane and call it “Unit Dies”.
→ I will show a picture of the whole trigger at the end for this one because it looks confusing at first.
Event will be ‘Unit Dies’ from the Unit category.
Add a Comparison condition under Conditions.
The default condition of “Owner of Triggering Unit” is actually right this time... but change the right side from ‘1’ to ‘5’.
Copy+Paste that last Condition.
Change ‘5’ to ‘6’ in our duplicate.
Our conditions (together) are a bit wrong though: We want to check that the dying unit is owned by player 5 OR 6... Right now it’s doing ‘AND’ by default.
So, add a new condition but in the popup choose ‘Or’ rather than our usual ‘Comparison’.
Then, drag our first 2 conditions into the Or. It should look like this:
(Now when a unit dies, it’ll check that the unit owner is either player 5 OR 6, and if so, it’ll do our actions which we’ll make next...)
So now before we go into Actions, we need to make a ‘player kills’ variable to keep track of each players’ kill count.
On the left pane, add a new Variable and call it “Player Kills”.
Type as Integer is good.
Check-off Array and make it size 4. (four is the number of players!)
Back into our ‘Unit Dies’ trigger: add a new action: ‘Modify Variable (Integer)’.
Change Variable to be ‘Player Kills’.
Change [0] to be a Function and choose Killing Player.
+1 can stay the same since that’s what we want to do.
Now that our variable counter is increased, we need to update the leaderboard. It doesn’t automatically update itself... but to update the leaderboard we need to check which player was the killing player (because player 1 means row 1 of the leaderboard, player 2 means row 2, player 3 means row 5, and player 4 means row 6).
Add a new action after our last one: an ‘If Then Else’ action.
In the ‘If’ block, add an ‘Or’ condition.
Now within the ‘Or’, add another condition (Comparison though).
Change it from “(Owner of Triggering Unit)” to be “Killing Player”
Leave the “== 1” as is.
Now copy+paste our last condition so we have a duplicate inside the ‘Or’.
Change the ‘1’ to be a ‘2’ this time.
In the ‘Then’ block, add a new action: ‘Set Leaderboard Item Text’.
Change ‘Last created leaderboard’ to be a Variable and choose our Leaderboard variable.
Change column to 2.
Change row to a Function and choose Killing Player.
Click on Text and change it to Function. Choose ‘Convert Integer to Text’.
Click on 0 and change it to a Variable. Choose Player Kills.
Now click on the last [0] and make it a Function... ‘Killing Player’.
So this’ll take care of players 1 and 2... But now we need to deal with players 3 and 4 (if they were the killing player)...
Click on the ‘Else’ block and add a new action... ANOTHER ‘If Then Else’ action (it should be sitting inside the Else!).
Copy the ‘Killing player == 1’ from our last ‘If’ block and paste it into this new one.
Change ‘1’ to be ‘3’.
Now copy the ‘Leaderboard – Set Leaderboard Item Text...’ action and paste it into our new ‘Then’ block.
Change ‘Killing Player’ to be a flat value of 5 (switch to the Value radial button).
Rest can remain the same for this action.
Now copy that last ‘If Then Else’ and paste it into its ‘Else’ block.
Change (Killing player == 3) to be (Killing Player == 4)
Change row 5 to row 6.
Here’s how it should look now:
The basic idea is that we check if the killing player is 1 or 2, and if so, update their leaderboard kills since their row is the same as their player number. Otherwise if it’s not 1 or 2, then check if it’s player 3. If so, we update his leaderboard kills. Otherwise if it’s not 3, we check if it’s 4 and if so update his leaderboard kills. Beyond that we do nothing. I hope you understand the chains of if-then-elses we have going here...
Our Unit Dies trigger is basically done aside from one technical fix we should do to prevent glitches. Whether or not you like it, in SC2 if AOE-damage kills a unit, it will cause this trigger to run twice for that one dead unit (a bug possibly...). People used to tell me on my old TD tuts that their ‘end of round’ triggers would run twice randomly and we didn’t know why or when... until we finally figured it out.
Luckily, there’s a relatively easy way to deal with it. We just (metaphorically) stamp a unit when our ‘Unit Dies’ trigger runs (for that unit). Then, if it happens to run a 2nd time on the same unit, it’ll see the unit has already been stamped and quit... preventing a ‘double run’ of the actions.
So back at the top of our actions for the trigger, add a new ‘If Then Else’ action. Should look like this:
In the ‘If’ block, add a Comparison condition.
Change the condition to be ‘Custom Value of Unit’.
Now change Value 2 to be 2.0 (this number is arbitrary other than it isn’t 0.0, the default).
In the ‘Then’ block, add a new action: ‘Skip Remaining Actions’.
‘Else’ block remains empty.
Now below our newly made if-then-else, add a new action: ‘Set Unit Custom Value’.
Change Last Created Unit to be Triggering Unit.
Leave the first 0.
Change the 0.0 to 2.0.
Should look like so: (Custom values are just numbers (Blizz gave us) we can store on the unit... purely for our own reasons).
So, let’s say an AOE damage effect kills a Weakling which causes this trigger to get run twice at once (well not exactly at once... but almost at the same time). The first run will come in and check custom value 0 and see it’s not 2.0 and then move on, setting the dieing unit’s custom value 0 to 2.0 and w/e else with the player-kills actions. Meanwhile the 2nd run will come in and check custom value 0. It’ll see that it is indeed 2.0 and it’ll skip the remaining actions of this trigger... thus preventing a re-run!
The trigger is done! Here is an image of it:
The next 2 triggers will be dealing with when a wave-unit reaches the end region of its side. Here is the trigger for the left side: We check that the unit entering the left end-region is owned by player 6... Then we lower the left lives by 1, update the leaderboard, play some sounds, and remove the unit. Finally we check if the game should be over (ie left lives have just become 0).
Let’s begin!
Make a new Trigger (in the left pane as always) called “Unit Reaches Left End”.
Add an Event: ‘Unit Enters/Leaves Region’.
Change ‘Entire Map’ to be ‘Region 001’ (under Value radial button).
Add a new condition (Comparison).
The default condition works here except change the == ‘1’ to be == ‘6’ (Triggering unit refers to the entering unit).
Add a new action: ‘Modify Variable (Integer)’
Click on Variable and choose ‘Left Lives’
Change the plus ‘+’ to be a minus ‘-‘
Now we will need to update the leaderboard... but let’s save ourselves time:
Go into our Initialization trigger and copy this line:
Head back to the ‘Unit Reaches Left End’ trigger and paste it below our first action.
Change ‘Last created leaderboard’ to be a Variable... our Leaderboard variable.
Next we will play a sound for the losing players, so add a new action: ‘Play Sound’.
Choose whichever sound you like (click on Sound Link and change it).
Click on All Players and change it to ‘Convert Player to Player Group’. Leave the ‘1’. This sound will only play for player 1.
Copy+Paste our last action ^
Change the player group ‘1’ to be ‘2’. Thus, this sound will only play for player 2.
Add another new action: ‘Remove Unit’
Leave it as Triggering Unit since that’s exactly what we want.
Note: We are using ‘Remove Unit’ rather than ‘Kill Unit’... because killing a unit will result in our ‘Unit Dies’ trigger being run and an error will occur!
Now we need to check if the Left Lives has hit 0. So, add an ‘If Then Else’ action.
Add a Comparison condition in the ‘If’ block.
Change it to be Variable and choose our Left Lives variable.
Change ‘==’ to be ‘<=’ just for security reasons.
Change ‘1’ to be ‘0’.
Add an action in the ‘Then’ block: ‘Turn Trigger On/Off’
Defaults are fine for this action. What it will do is simply prevent this entire trigger from being run ever again... it will let the current run finish though!
Add another action in the ‘Then’ block: ‘Text Message’
Click on Message and type in “Right Wins!” and hit OK.
Add another action in the ‘Then’ block: ‘Wait’
Change 2.0 to 3.0
Add another action in the ‘Then’ block: ‘End Game for Player’
Change ‘1’ to be ‘3’
Copy + Paste this last line ^
Change ‘3’ to ‘4’
Copy + Paste this last line ^
Change ‘4’ to ‘1’
Change Victory to Defeat
Copy + Paste this last line ^
Change ‘1’ to ‘2’
This trigger is done!
Let’s do the right side now... everything is basically the same except some values have to be switched.
So, copy+paste our ‘Unit Reaches Left End’ trigger. Rename it to be “Unit Reaches Right End”.
Change the Event:
“Region 001” needs to be “Region 001 Copy”
Change the Condition:
Change the ‘6’ to be a ‘5’ since we want to check for player 5’s units entering.
Change the first action:
Needs to be ‘Right Lives’ rather than ‘Left Lives’.
Find the Leaderboard action:
Change the row to be 7
Change the text from “Left Lives: ” to be “Right Lives: ”
Change the right-most ‘Left Lives’ to be ‘Right Lives’.
For both Sound actions:
Change the player:
Change 1 to be 3 in the first Sound action.
Change 2 to be 4 in the second Sound action.
Now for the 'If Then Else':
In the ‘If’:
Change it from “Left Lives” to “Right Lives”.
In the ‘Then’:
Change the Text Message to be saying “Left Wins!” rather than “Right Wins!”
Change the first two ‘end game..’ actions to be Defeat rather than Victory.
Change the last two ‘end game..’ actions to be Victory rather than Defeat.
We are essentially done, but have to make one more fix to both of our ‘unit reaches end’ triggers.
Select the ‘Trigger – Turn (Current Trigger) Off’ line and copy it.
Paste it on itself and it should make a duplicate right below it.
Click on ‘Current Trigger’ in our duplicate and then switch to the Value radial button. Choose ‘Unit Reaches Left End’ and hit OK.
Now copy this action and switch to the ‘Unit Reaches Left End’ trigger.
Paste it right below the ‘turn current trigger off’ as we did a moment go in the other trigger.
Click on ‘Unit Reaches Left End’ and choose ‘Unit Reaches Right End’ from the list of choices. Hit OK.
Now, when the left side causes an end-of-game, it’ll turn off the right-side trigger (and vice versa). This will prevent the game from potentially ending twice if both sides reached 0 lives around the same time (could happen!!).
Here is the image of the ‘Unit Reaches Right End’ trigger: (Note: I won’t show an updated image of the ‘Unit Reaches Left End’ trigger since we just added that one ‘turn trigger off’ line...)
Okay folks, just 4 small triggers to go!!! Up next is anti-block... It will work by checking RIGHT after a player starts building. It will check whether or not a unit could spawn and successfully reach the end region... and if it can’t we refund your building instantly.
Make a new Trigger and call it “Anti Block Left Side”.
Event will be ‘Unit Construction Progress’.
Change ‘Completed’ to ‘Started’
Add a Comparison condition to the Conditions.
Change ‘Owner of Triggering unit’ to instead be ‘Triggering Player’.
Leave the ‘== 1’ as is.
Copy+Paste this last ^ condition.
Change ‘1’ to ‘2’.
We need to put both of these conditions under an ‘Or’ condition... so add a new condition of type ‘Or’. Then drag both of our previous conditions under that ‘Or’.
Now add a new condition after those last 2 conditions... of type Comparison.
Change it to be ‘Pathing Cost between Points’.
Click on the left-bracket of the first “(Position of (Triggering Unit))” and change it to the Value radial. Then choose Point 005.
Now on the remaining “(Position of (Triggering Unit))”, click on its left-most bracket and choose ‘Center of Region’ as the Function.
Click on Region and change it to be Region 001.
Click on ‘2’ and change it to be 65536. This number is not random. It’s the max and means ‘unpathable’ or ‘blocked’ basically. Should look like this:
We need to fix up our conditions now... the hierarchy is wrong...
Click on the top ‘Conditions’ header of the Trigger.
Add another new Condition, except of type ‘And’.
Now drag our previous ‘Or’ group underneath the new ‘And’.
Then, drag out our last ‘pathing cost...’ condition to be just above the ‘Or’. It should look like this:
What this means is that if the constructing (aka triggering) player is player 1 OR player 2, AND there is no path from the (left lane) start to (left lane) end for a mob, then we can proceed into our actions which will refund the building...
So, add these actions (order is important for the first 2 actions):
‘Modify Player Property’
Change ‘0’ to be a Function... ‘Triggering Player’
Change ‘Set To’ to be ‘Add’
Change ‘1000’ to be a Function... ‘Unit Type Cost’
Click on Unit Type and change to be ‘Unit Type of Unit’ (under the Function radial button)
Change ‘Triggering Unit’ to be ‘Triggering Progress Unit’
‘Remove Unit’.
Change ‘Triggering Unit’ to be ‘Triggering Progress Unit’ which is the tower that was just built!
‘Text Message’
Change Message to be “You blocked! Tower refunded!”
Change (All Players) to be Convert Player to Player Group
Click on 1 and change it to the Function radial. Choose Triggering Player.
Left side is done! Here is the image...
Let’s duplicate this last trigger: Back on the left pane, copy ‘Anti Block Left Side’ and paste it.
Rename to “Anti Block Right Side”.
Time to fix up some conditions:
Change the pathing-cost condition:
Change Point 005 to be Point 006.
Change Region 001 to be Region 001 Copy.
Now the other 2 conditions:
Change the (Triggering Player) == 1 to be (Triggering Player) == 3
Change the (Triggering Player) == 2 to be (Triggering Player) == 4
Actions can remain the same!
Here is the right side’s trigger:
Next up is dealing with when a player leaves the game...
On the left pane, add a new Trigger. Call it “Player Leaves Game”.
Event is ‘Player Leaves Game’
Change ‘Victory’ to be ‘Any’
Add a new action: ‘Wait’
Change 2.0 to 1.0
Add another action: ‘If Then Else’
Add a new Comparison condition in the ‘If’
Change the condition to be ‘Status of Player’
Change the ‘==’ to be ‘!=’ which stands for ‘not equal to’
Click on Value 2 and change it to the Preset radial and choose ‘Playing’
Copy+Paste our last condition ^
Change ‘1’ to ‘2’
Next, add a new condition of type ‘And’.
Drag our first 2 conditions under this ‘And’.
Then, click on the ‘And’ and ctrl+c (copy) and ctrl+v (paste) it. Should look like so:
Let's fix it up...
Change player ‘1’ in the 2nd ‘And’ block to be player ‘3’
Change player ‘2’ in the 2nd ‘And’ block to be player ‘4’
Now make a new ‘Or’ condition at the top of the ‘If’ block.
Drag both ‘And’ groups underneath that ‘Or’
Finally, should look like so:
So what does this all mean? It means that when a player leaves, we wait 1 second to make sure they are fully registered as disconnected... then we check ‘if’ either side has no active players... ‘then’ we will end the game (we’ll make this part in a sec). That’s what this hierarchy of conditions does... if Player 1 AND 2 are not playing OR player 3 AND 4 are not playing.
→ Let’s finish the ‘Then’ block (and the trigger)...
Add an action inside the ‘Then’ block: ‘Text Message’
Change Message to be “Game Over!”
Add another action after ^: ‘Wait’
Change 2.0 to 3.0
Add another action after ^: ‘Pick Each Player in Player Group’
Change (All Players) to be (Active Players)
Inside the Actions for that ^ last action, add one action: ‘End Game For Player’
→ Change Victory to Tie
→ Change ‘1’ to be a Function... choose Picked Player
Now the game will end in a tie (for whoever is remaining) if one side loses its players.
(Image just to confirm): → However, in the case that the game is not over, we want to still update the Leaderboard to say “Player has Left” or something along those lines. To do this we will save time and copy from a previous trigger.
Go into our Unit Dies trigger. Copy the big If-Then-Else (see image below for which one):
Now switch back to our ‘Player Leaves Game’ trigger.
Click on the header for Actions:
Then, hit paste (Ctrl+V). You should now have the giant ‘If Then Else’ actions above that ‘wait 1.0 second’ action.
Go through each of the three ‘Leaderboard – Set...’ actions and do the following:
Change column ‘2’ to ‘1’
Click on the left-most bracket of “(Text(PlayerKills[(Killing Player)]))” and change it from the Function radial button to the Value one. Type in “Left the Game”.
Now go through every of our newly-pasted actions/conditions and change each instance of ‘Killing Player’ to be ‘Triggering Player’.
Here is an image of the new (top) half of our ‘Player Leaves Game’ trigger:
Okay, onto the last trigger! A SUPER EASY ONE TOO!
On the left pane, add a new trigger; call it ‘Player Sells Tower’
Add the Event ‘Unit Uses Ability’
Click on Ability and search for ‘sell’ and choose our Sell Tower ability and hit OK.
Click on Generic1 – Any and change it to Generic3 – Execute.
Now let’s add an action: ‘Modify Player Property’
Change ‘0’ to be a Function. Choose Triggering Player.
Change ‘Set To’ to be ‘Add’.
Change ‘1000’ to be a Function. Choose ‘Arithmetic (Integer)’
Change ‘Value 1’ to be a Function. Choose ‘Unit Type Cost’
Click on ‘Unit Type’ and change it to be a Function... choose ‘Unit Type of Unit’
Change the plus ‘+’ to be divide ‘/’
Change the ‘1’ to be a ‘2’
Check that it looks like this: Pretty simple... when the tower is ordered to sell (ie player clicks sell button), we give that player (in minerals) the value of the unit divided by 2... aka 50% refund!
Yep. That’s it. Tutorial over. Go play and I hope it works for you!
Now you can add more towers, more waves, more races/builders, and w/e else TDs have these days.
Let me know if there’s anything you think could/should be fixed or changed on this tutorial.
THIS TUTORIAL IS FOR BEGINNERS. I GO THROUGH EVERY STEP RIGOROUSLY.
:D
You are the man OneTwo !
And you've put lot of care: text colors !
I won't make a td, but I'll watch some part of the tutorial, I think that I've seen dark templars firing flames and having interesting sounds... anyways, thank you for sharing some of your time with us :)
Thanks. I think the video is easier to go through too. While writing the text version of this, I realized how thorough you have to be because I can't just tell people "Change the condition"... you have to know that you click on the left-bracket of 'owner of triggering unit' to change it... stuff like that which made this text one so long...
On a side note, how would you go about generating a bunch of waves with different unit types in them?
Say I wanted to create 20 waves composed of different amounts of 5 different unit types (ie: wave 1: 15 zerglings, 5 hydras, 2 roaches, 2 mutas, 1 ultra. Wave 2: 20 zerglings, 10 hydras, 5 roaches, 4 mutas, 2 ultras. And so on)
I've tried various approaches, but it seems like i'll be forced to create a huge amount of data without being able to use loops.
Any way to populate an array like so: "Wave 1 (int array) = [15] [5] [2] [2] [1]" instead of having to set each index manually?
was my first time using this software (i bought sc2 2 days ago just so i can play about with galaxy) i found it very easy to follow this tutorial and i made a few mistakes (spent an hour trying to find out why i couldnt link to my race buttons, they were new dialog's not dialog items lol my bad)
but this has given me a brilliant headstart into understanding how everything interacts.
i love how you have made everything very clear and precise the order with which to do things and such, having the images there for those nested if-then-else statements and also being able to refer to your video's when i did get into trouble was very helpful.
also you didnt pull any punches man, as a begginer tutorial the scope here is massive, leaderboards, antiblocking, its mad!
i now have a fully functioning TD with tons of unique waves, next up more towers!
It's obviously going to be more work to do that. But I would start by simply making wave_types[] and wave_counts[] as 2 dimensional arrays. Meaning you increase the 2nd 'size' for each ones array to 5 rather than 0. This way in your initialization you can go (assuming your example):
Wave Types[0][0] = Zergling
Wave Types[0][1] = Hydralisk
Wave Types[0][2] = Roach
Wave Types[0][3] = Mutalisk
Wave Types[0][4] = Ultralisk
Wave Types[1][0] = Zergling
Wave Types[1][1] = Hydralisk
Wave Types[1][2] = Roach
Wave Types[1][3] = Mutalisk
Wave Types[1][4] = Ultralisk
(May seem a bit repetitive but being this exact will let you change which 5 unit types are spawning... assuming later on a harder or different set of 5 unit types would be spawning)
Then in the wave spawn youll have to add/fix actions... (ie create Wave_Counts[Current wave iteration][0] of Wave_Types[current wave iteration][0] at w/e point and then order to move. THEN create Wave_Counts[Current wave iteration][1] of Wave_Types[current wave iteration][1] at w/e point and then order to move... repeat up to [4].
Thanks bud! It sounds like I paid you to say that lol... glad you found the tutorial. My first text/vid combo. I'll be adding in links to parts of the vid throughout the text-tutorial soon.
Also, you're not the first one who messed up dialogs vs dialog items. I'd say thats #1 or #2 in terms of peoples' errors over the last year of tutorials lol.
Awesome tutorial OneTwoSC, I really appreciate you taking the time to go through that.
I read through the guide and watched the video and got everything up and running, towers work, units die and such.
I have one (two) problems with it though with the Leaderboard updating kills and lives. I've looked over the guide and matched everything up as best I can, picture perfect mirror of what you did, but the numbers never change.
It's clearly tracking the live though, cause a player will die if 30 lives are lost, but the leaderboard won't update to reflect it. Here's how my Unit Dies trigger looks, seems to match with yours as far as I can see.
i'm an software engineer from germany and i'm just about to get some expirience in designing sc2 maps. Your TD-Tutorial is a good thing to start with, but i got a problem with the "Player Sells Tower"-Trigger on my map it gets fired like 7 times if i sell one cannon. Do you know how to fix this?
Okay solved this problem while writing... the stage in the event was not "Generic3"
anyway i leave this to say good job!
EDIT: I have found another problem (it is not the time :D) if i copy or duplicate the turret-actor (for "sun cannon") it will get some "UndefinedVariable" errors inside Attachment: CActorTurret_PitchQuery (i use the rawdata format name because of localization(i dunno what the heck they thought about doin a localization of this editor)) and if i use this actor with the "UndefinedVariable" errors left it will just blow up the entire map. If s/o got this error too just make the raw data of this field looks like: ":IGNORE".
Maybe this error is a result of the current patch..
Onetwo, I love the tutorial and you have inspired me to make a tower defense of my own this time all the way through without giving up because its too much work. I have looked at some of your older videos on youtube and you have a TD that has some lights that show the way the mobs will be taking the path, is there any way that you can give a tutorial on that?
I have a problem with naming the tower. "4. (Models) Photon Cannon Copy." I don't have this in my Data it does not show any Photon Cannon Copy under the (Models) but everything ells does is this a problem with something i did.
I have been struggling with this for a LONG time now. Not just THIS specific tutorial. But practically ALL your tutorials. Now, I understand that this is from v1.3.6 of the editor, and that we are now on v1.4.3 or something. But the problem I have run across has been THE EXACT SAME THING. Both for the videos and this text version.
When duplicating a unit and trying to follow along with the tutorial (text/vid), the Editor will NOT copy the actor properly. For this instance, I am trying to make the Sun Builder and this seems to go "with no issues". I find the Probe in the main files, I right-click and then choose Duplicate. I check ALL the boxes you instruct me to but then I end up with the standard "green man" icon next to the main object in the object explorer. Also, there is absolutely NO Actor at all associated with this duplicated unit.
If I swap over to the Actors tab, there IS a "Sun Builder" actor. However, it is not associated with the Unit. When I try and muddle around and make the Editor use the actor (instead of "Probe" or "Probe Copy"; usually also may have an "(Unknown)" thrown in next to it), nothing changes. Still the "green man" in the Object Explorer. Going back to the Main Window under Units (to add one into the map), choosing "Player 1" and then "Unit", doing a search for my unit (in this case "sun") brings up the same problem: "Sun Builder" with the annoying "green man" icon next to it and clicking it and then a spot on the map drops a "nothing" into the map. I hear a sound, and a colored [red] box appears on the mini-map. But nothing actually shows up in the view on the main window.
This is pretty much the most frustrating thing! It's been happening for SO long and has literally put a monkey-wrench into anything I am attempting to learn from you! I do not know where to turn. I have muddled through before and gotten "it to work" by just improvising. But I want to know why it works for you and not for me! Can you help!?!?!?
Rollback Post to RevisionRollBack
To post a comment, please login or register a new account.
I started making tutorials over one year ago with my ‘simple td’ tutorial. Shortly after, I improved on it with my ‘advanced td’ tutorial... but, both of those are well out of date now... which brings me to:
Versus TD Tutorial (Done on patch 1.3.6 of SC2)
This is a brand new tower defense tutorial, co-released in video and text format!
THIS TUTORIAL IS FOR BEGINNERS. I GO THROUGH EVERY STEP RIGOROUSLY.
I view this tutorial as a journey; if you can finish it you will be rewarded... but if you already know how to do things then this may be a bit ‘long’ for you...
You can watch that ^ or read below and go through the text tutorial.
Map Download:
Link Removed: http://www.mediafire.com/?u9xl6y0rww381wy
(I think this text portion is a Guinness World Record for longest tutorial...)
This tutorial will feature:
The only notable thing I do not show is tower upgrading (I have shown this in both previous tuts).
Structure
(Sorry, formatting/coloring gets crappier near the end because I gave up, took way too long to format it all lol!)
PART 1 - SETUP AND TERRAIN
With the Starcraft 2 Editor open (accessible from where you installed SC2), hit File->New.
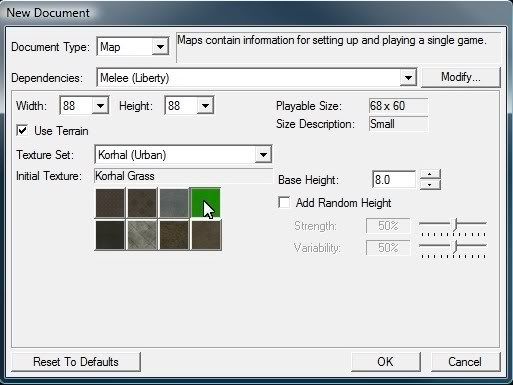
This window will pop up:
Hit “Modify...” (near the top right).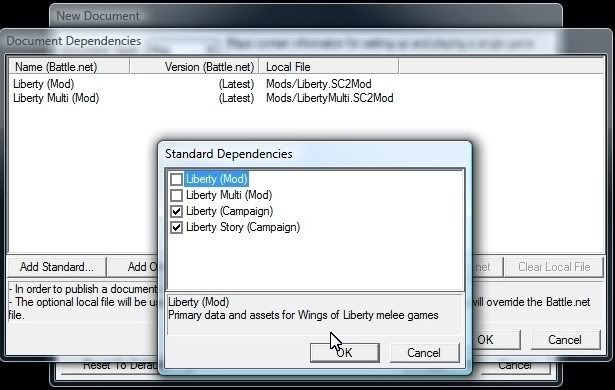
This window, “Document Dependencies”, will pop up:
→ This will add in all of the necessary models from the campaign.
Now hit OK on the original “New Document” window and let it load until you’re presented with an endless sea of grass terrain!
→ We will be painting some cliffs to build boundaries for the players. As well, some texturing to spruce it up (if only slightly even).
Hit the “T” key (or tap the “Layer” button at the top and click on “Terrain”) to switch to the Terrain Layer. The left pane should now look somewhat like so:
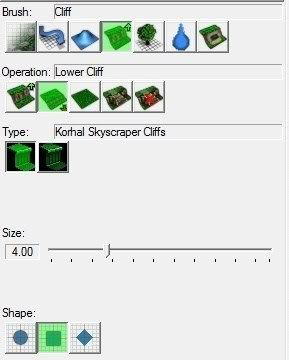
→ We are going to paint a ‘valley’ in between the two sides.
Zoom out on the terrain using mouse-wheel, and pan to the center by right-mouse dragging.
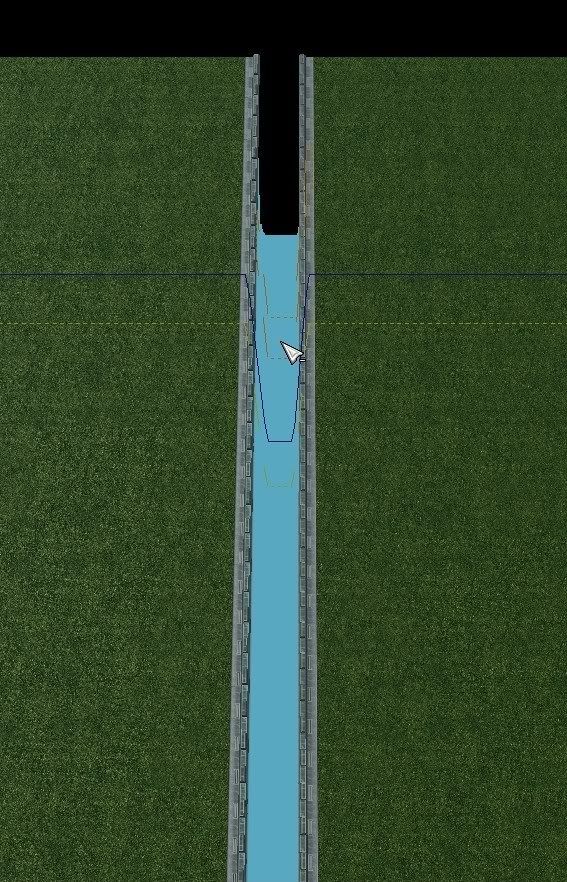
→ Hit “G” to show grids if needed (and hit “O” to show camera bounds also if desired).
Paint down the center somewhat like in the above image.
Now switch to the Raise Cliff Operation.
→ PLEASE do a nicer job than me; I rushed through pretty fast for video so it looks quite crappy lol.
In the end the shape should look like the last picture of my minimap (although like I said, please do it much straighter and nicer).
Now Click on the Texture Brush mode and choose the Operation of Fill Texture.
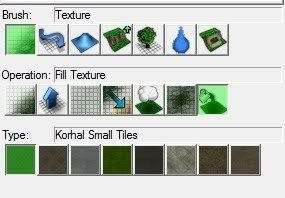
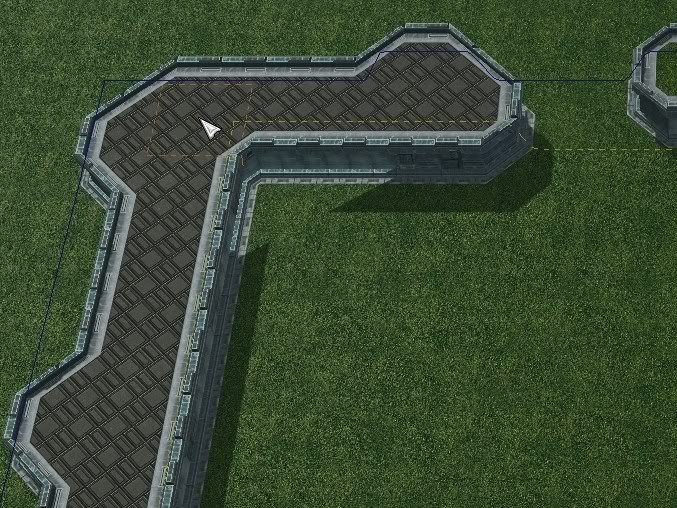
Choose Korhal Small Tiles as the Type. (see image below).
Now click once on each of the raised-cliffs to fill in the tile texture. This gives the player a better indication of where they can build (and where not).
Next we will paint some concrete around the mob-spawn areas and mob-end areas (again for a visual indicator). → Please paint it up nicer than me as I was rushing for video.
(Paint concrete in 4 places: left mob spawn, right mob spawn, left mob exit, right mob exit)
→ That’s it for terrain in terms of bare-bones. Feel free to have some artistic license and paint around or make more interesting paths for the mobs.
Now we will place a nice dashed-line doodad on the mob-exit points.
Hit “D” to enter the doodads layer or choose Layer->Doodads from the top bar.
→ (as an FYI, using comma/period will work for any doodad that has variations... but not all have them).
→ Line them up as best you can if they don’t fit perfectly :)
Let’s duplicate these 3 (or more if you have) for the other side’s mob-exit.
At this point we are done with doodads; however, you can explore all of the cool doodads and drop some around for some decent eye candy. Be careful about symmetry though.
We will now place some points which will be used by triggers later for spawning mobs and spawning the players’ builders.
Hit your P key to go to the Points Layer or (as usual) you can hit Layer->Points from the top bar.
Click on “Normal” for Add Point:
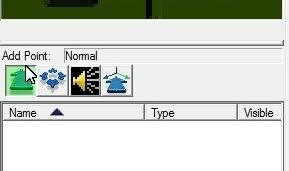
We are going to place 4 points (one for each player’s builder spawn). Drop the first point in this area:
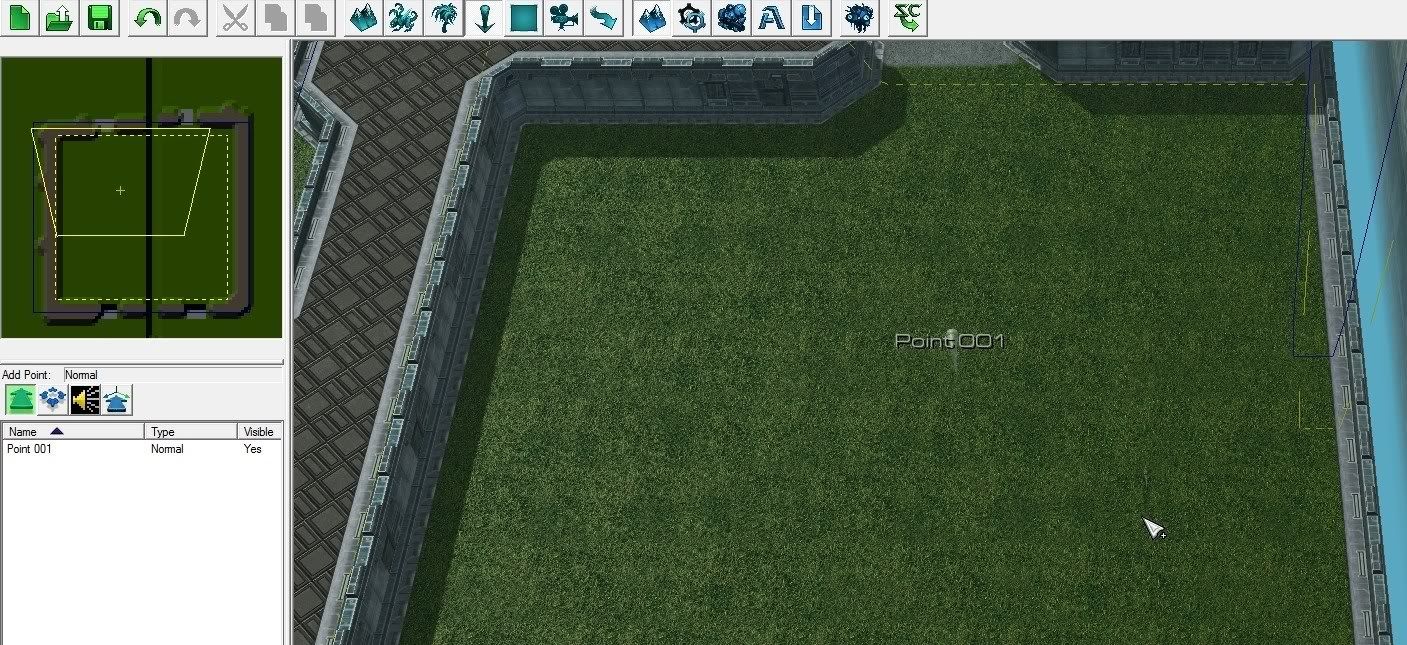
Now drop the next 3 points based on these images (or be creative if you feel like):
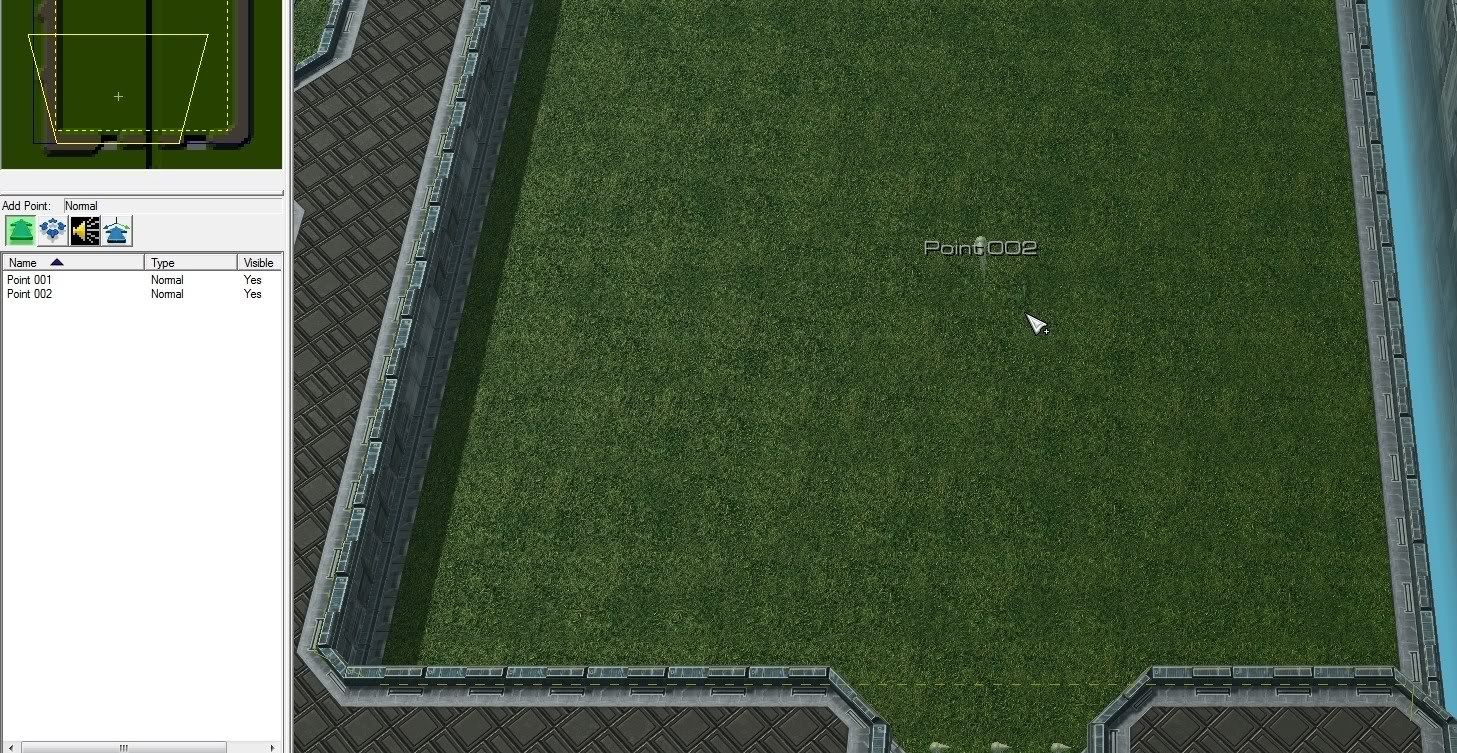

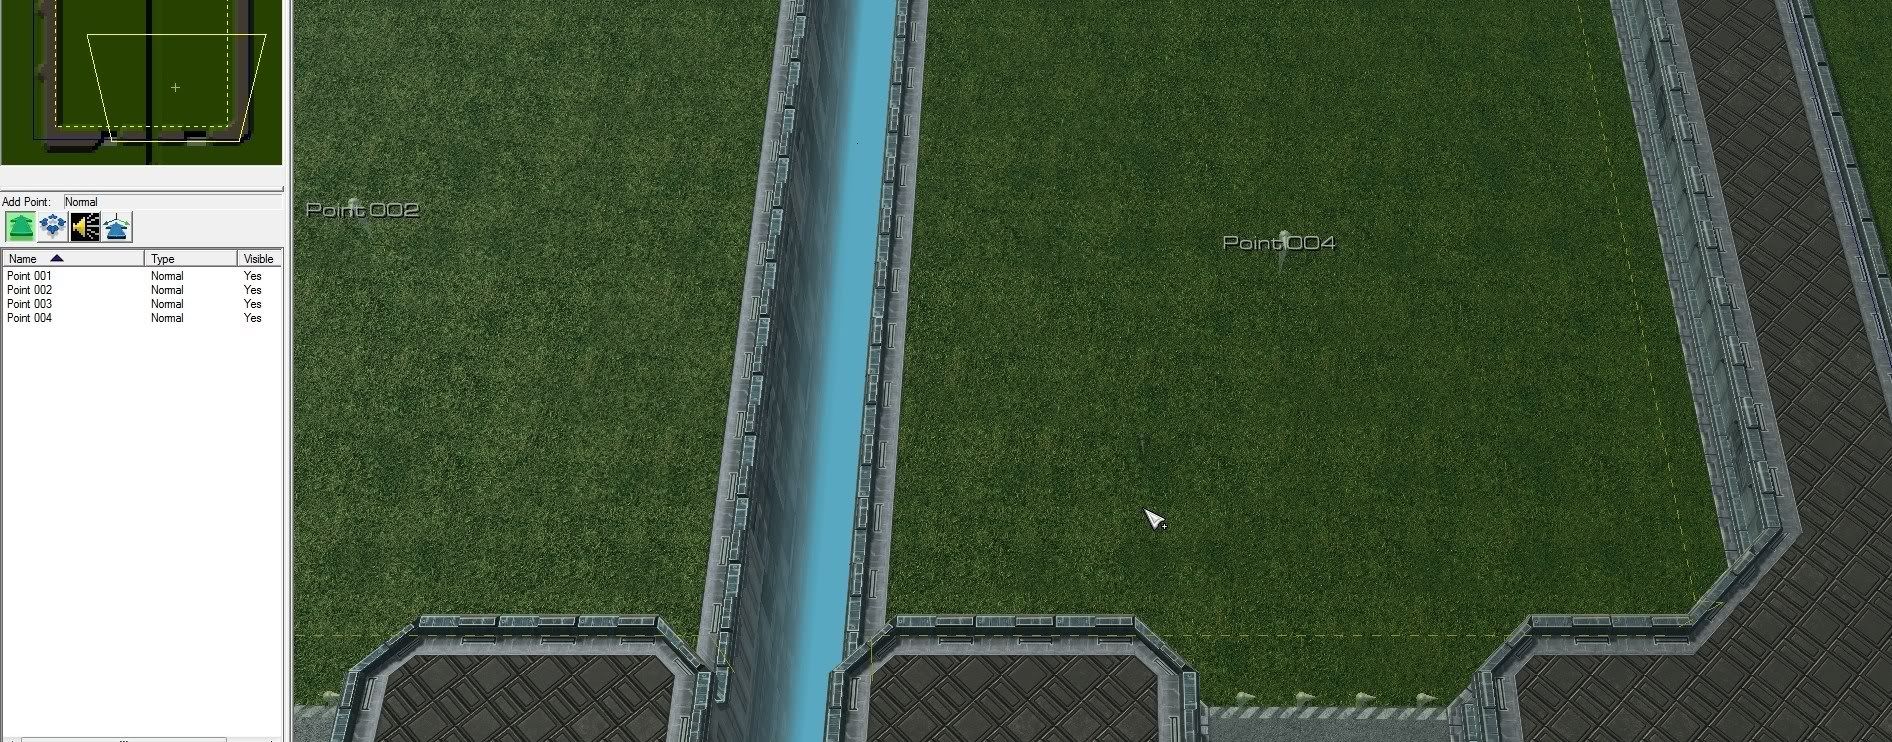
→ Keep in mind I’m using Point 1 as player 1’s area, Point 2 for Player 2, etc... but you can rename your points if you desire (right click them in the left pane to rename). But let me be clear on one thing: Players 1 & 2 will be on the left; Players 3 & 4 will be on the right.
And finally drop a 5th point in the top left mob spawn and then a 6th point in the top right mob spawn:

(Note: make sure they are inside the blue boundary line. Adjust your concrete paint if necessary).
Woohoo, done with points!
Next, we will be creating 2 regions for the mob-exits. These will be used in triggers to detect when a mob has reached the end of a lane.
Hit R on your keyboard or Layer->Regions from the top bar. On the left pane now, click on the Rectangle:

Drag on the left side’s mob-end point as in the image below:
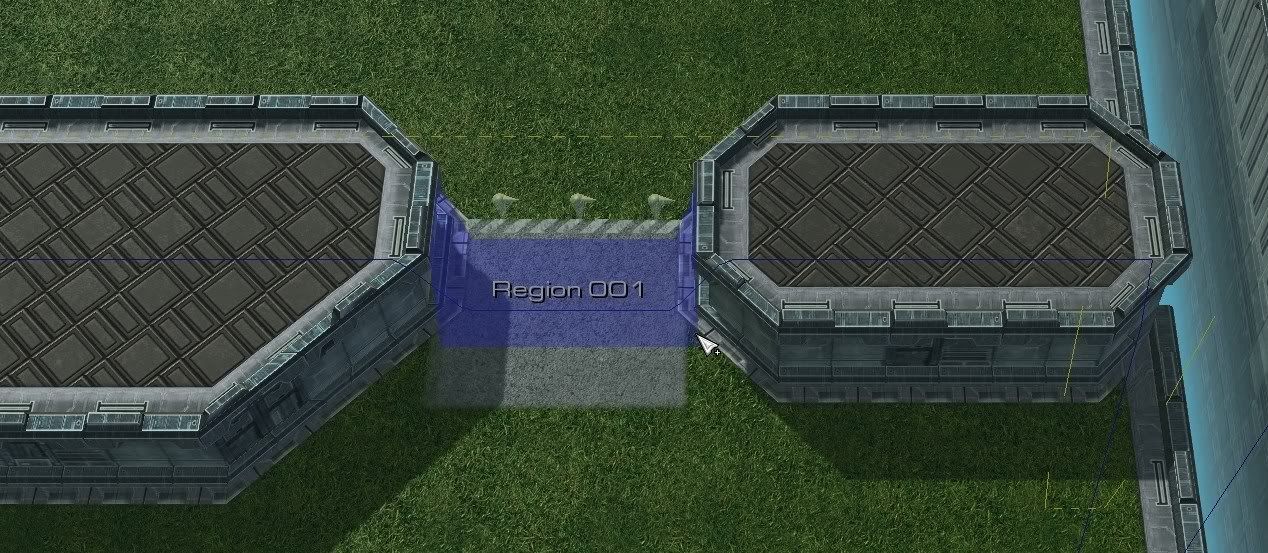
→ If you need to re-adjust it, hit escape and then select/drag it. Then repeat the previous step to go back into ‘add region’ mode.
When ready, now drag another region on the right side’s mob-end zone.
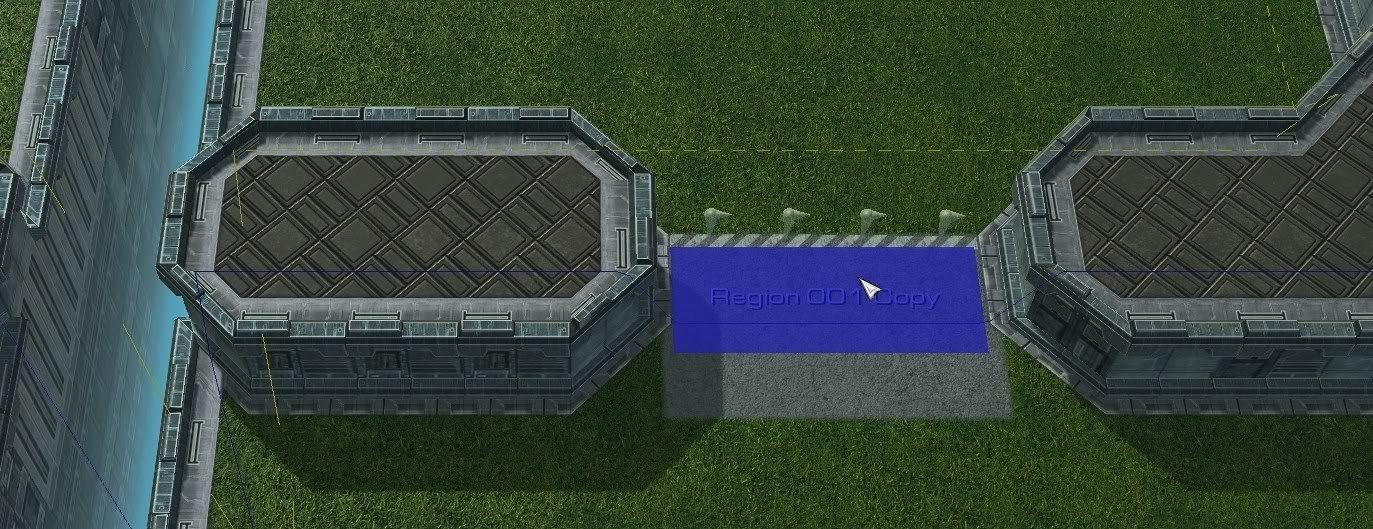
→ You could also copy paste the last one we just made; however, you may have to resize it (escape, then double click the region and adjust the size values).
We’re done with regions, now onto pathing blockers...
We are going to paint some pathing to prevent players from running into no-no zones. As well, to prevent building on no-no areas :D
Hit “H” to go to the pathing layer (or Layer->Pathing from top menu).
→ If you make a mistake, you can switch to the ‘remove pathing’ button and then paint that to erase any over-painted areas.
Once finished with that, we will be painting ‘No Pathing’ around every other boundary. Set your tools like so:
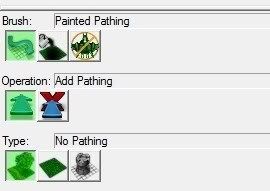
Now paint around the edges:
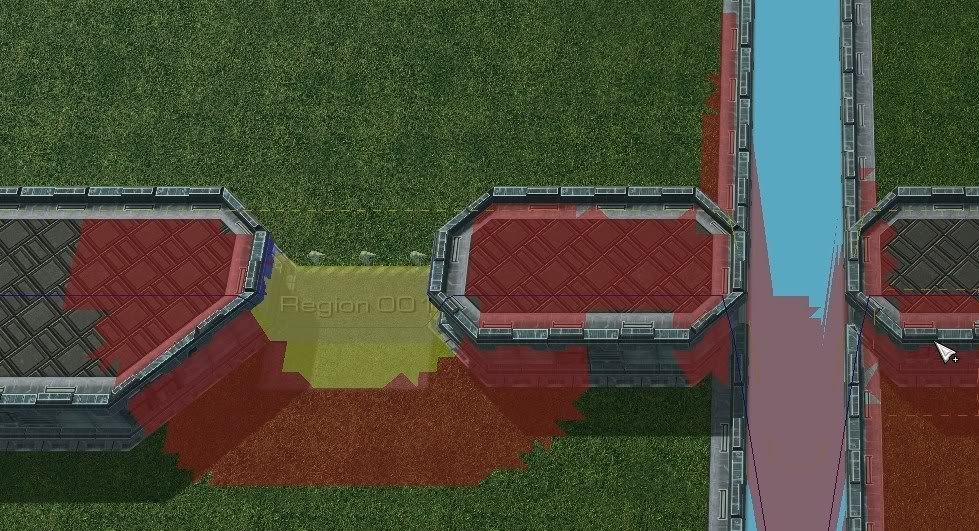
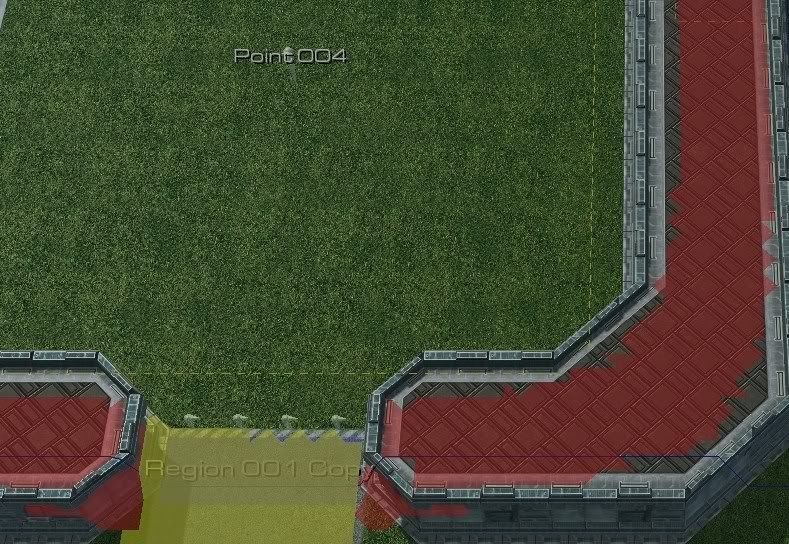
Keep painting until all areas you don’t want the player to access are covered (including the center boundary if you wish).
Pathing is done!
Time to set up the map info.
Hit the Map button on the top toolbar and click on “Map Info”.
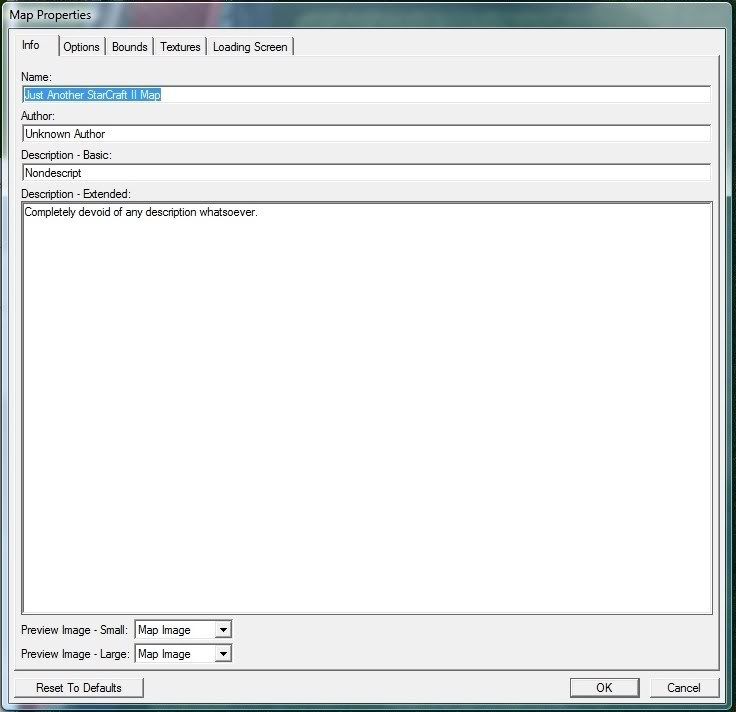
This window should pop up:
→ The Name field will be what your map appears as on Battle.Net (note: this can be completely different than your physical map-file name).
I believe Author and Description-Basic are ignored by Battle.net, but feel free to fill them in.
The only other important tab here is the Loading Screen:
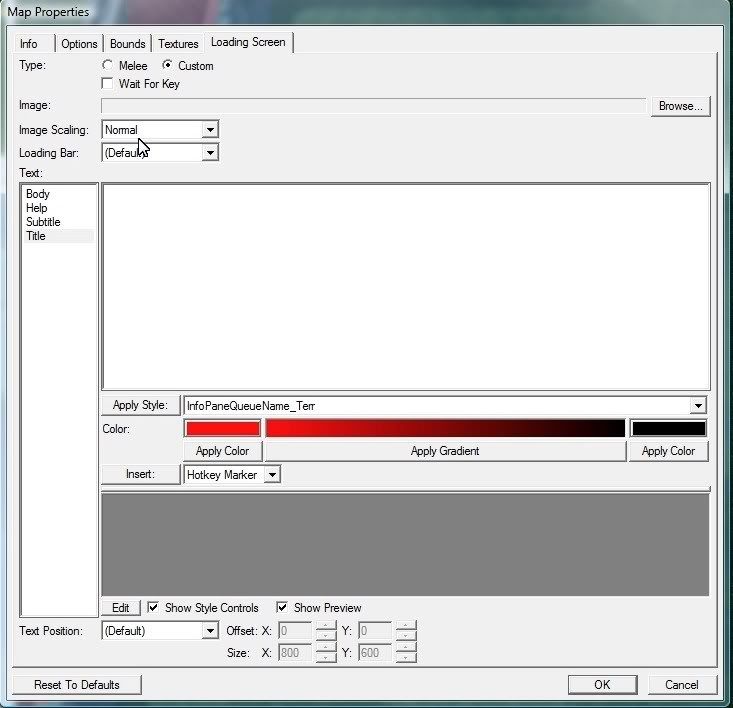
Here you can choose “Custom” which will show a black background, unless you choose an image.
You can also enter text for the Title, Body, etc... such as patch notes for your map!
When done, hit OK.
Player Setup now...
→ We will add all of the players for the map.
Pretty simple:
Hit OK and we’re done with this step... no wait... were done with this section!!!!!!!!! YEAH!!!!!!! At this point the map is all prepared to be injected with some units, towers, and all of the logic.
PART 2 – DATA EDITOR
So... Data... time to make some towers! Then we will make the builders and mobs.
Hit the data editor button on the top bar:

A window should pop up: The data editor.
The first check I will make with you is that you have the right settings. Note that patch 1.4 looks slightly different.
(All 5 at the top right, and then the observer button plus that other one just above this text)
As you can see I’m already on the Units tab.
Now search for “Photon Cannon”. We are going to duplicate it and make it into our first tower: The Sun Shooter.
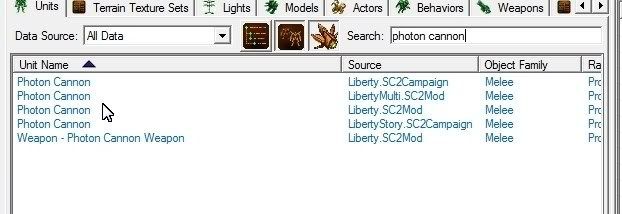
Right-Click on any one of them (I used the one with ‘Source’ of LibertyStory).
A window will pop up with a bunch of checkboxes.
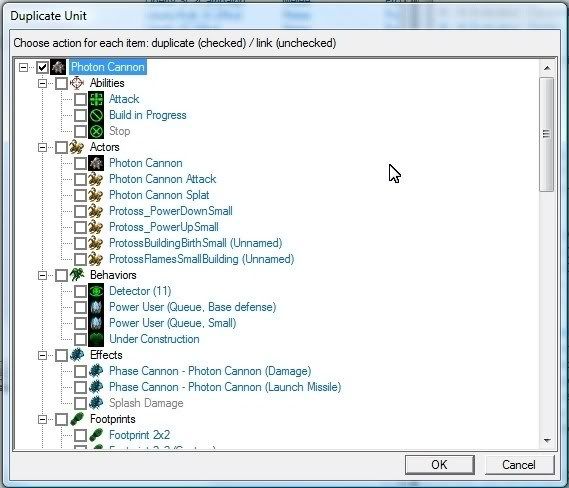
So what do these checkboxes represent? Well, by checking a box, we are saying we want to duplicate that element also. By not checking a box, we are saying that we just want to ‘link’ to the already-made object. Eg for abilities, I would check Attack if I wanted to make my own version of the Attack ability; Otherwise by not checking Attack, our duplicate unit would use the Attack ability already present in the editor.
Well, check off the following items:
→ Explanation for those who care: We want a duplicate of the ‘photon cannon’ actor because every unit needs an actor, period. An actor controls the visual aspects of the unit while the ‘Unit’ itself is just really a mathematical object. Subsequently the actor uses a model so I have decided to check the Model for it as well (actually optional though).
Side note: Unfortunately duplication does have one problem: It doesn’t duplicate everything we need. So, later we will be doing some more granular copy-pasting to fix up some things. Don’t worry atm.
Now hit OK with those items checked.
You will now see your new duplicate and its ‘hierarchy chain’ in the Object Explorer (bottom left pane):
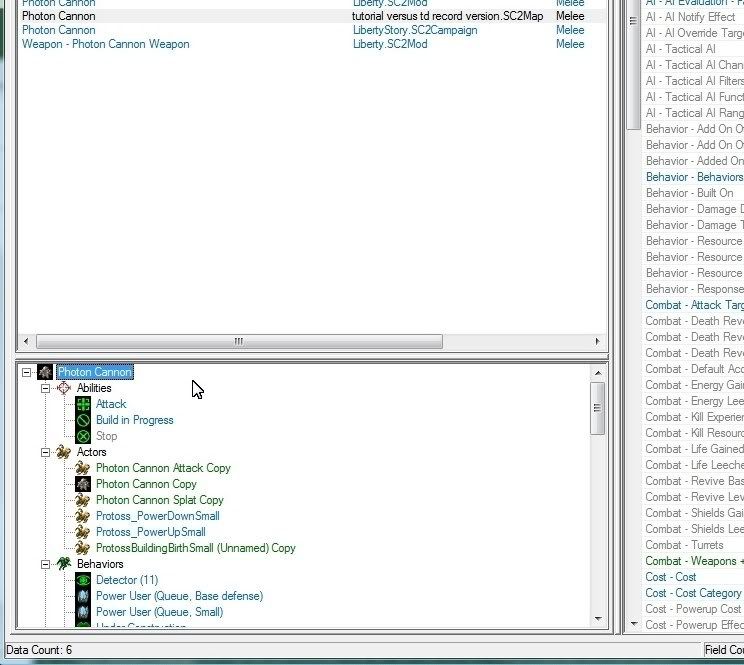
The first and lengthy task is to rename everything (as well as some minor fixes).
Follow in order please:
1. (Weapons) Phase Cannon – Photon Cannon Copy.
HOWEVER, it will still say that lame “Phase Cannon” in front. Blizzard used an “Editor Prefix” to do this... editor prefixes are text that you can put on data that’s only visible to the editor.
In this case, we don’t want any prefix:
Good! Now we can move onto the next item:
2. (Units) Weapon – Photon Cannon Weapon Copy.
There’s one issue we have to take care of with this “Sun Shooter Weapon” object. Since it is the ‘Unit’ that is the missile of our weapon (weapon missiles are just units btw), it controls the movement of the missile. However, when we renamed it, it AUTO changed the name of its mover (Blizz built this into the editor... while useful sometimes it screwed us up here).
So to fix that, click on our newly renamed “Sun Shooter Weapon” if not already on it (may have to scroll back down in the object explorer).
→ From now on when I say 'rename', I intend for you to click Suggest as well.
3. (Turrets) Photon Cannon Copy.
4. (Models) Photon Cannon Copy.
Back to the Object Explorer pane:
5. (Effects) Phase Cannon – Photon Cannon Copy
6. (Effects) Phase Cannon – Photon Cannon (Launch Missile) Copy
→ The user/player will never see the names of these effects so it’s not a huge deal how formal you name things (LM versus Launch Missile etc).
7. (Actors) ProtossBuildingBirthSmall (Unnamed) Copy
If you click back on that ^ actor, you should see a field on the right labeled “Event – Events+”.
In this event list, there are a bunch of ‘events’ each with actions. Most notably the ones for when a unit’s construction starts... which then create this actor. Based on the list above, an example would be that if a Dark Shrine’s construction is started, it will create this actor (the blue energy ball for Protoss btw). Then when the construction is done, it will ‘destroy’ this actor (the first grayed out event does this).
→ It’s pretty easy to add/remove events in here. You just right-click and Add Event OR you could just copy paste (and change) one of those events such as the one I have highlighted in the picture above. Right now, though, we don’t actually need to do anything because by duplicating this, it automatically added an event for our Photon Cannon Copy (raw name is PhotonCannon2 as you can see above ^).
When you make more Sun towers later though, rather than duplicate the “ProtossBuildingBirthSmall (Unnamed) actor every time, you could just add an event to this one (sort of how Obelisk, Dark Shrine, and Pylon were already in this one). By all means you could duplicate every time but it’s needless waste... and if you choose to do neither all it means is that your buildings will have no construction energy ball (cosmetic, but yeah...).
8. (Actors) Photon Cannon Splat Copy.
9. (Actors) Photon Cannon Copy.
10. (Actors) Photon Cannon Attack Copy.
11. Finally now, we will rename the Unit itself.
Right after this it is likely your Sun Shooter will disappear and you’ll have lost its selection.
Now you should see your tower as above ^
Click on your ‘Sun Shooter’ tower. We are going to fix and change-up a lot of the values (such as attack speed, damage, etc...).
In the Object Explorer window again (bottom left pane in case you forgot), scroll down to the Weapons list and click on the “Sun Shooter” item under Weapons.

On the right pane, find the “Stats – Period” field.
Also in the weapon, find the field “Weapon – Target Filters”.
In the new window, uncheck Ally, Neutral, and Player. This will prevent this tower from being able to attack allies basically.
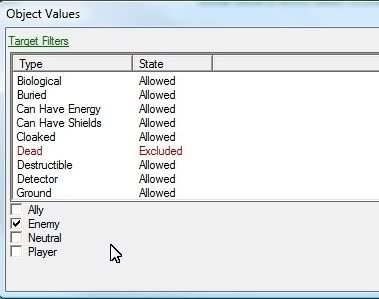
→ You can also right click and change any of those other filters in the list (such as you could right click ‘Ground’ and change it from ‘Allowed’ to ‘Required’ if you wanted the tower to only hit ground targets. I will leave them the same.
Now we will go change the weapon’s damage:
At this point our weapon will be doing 3 damage every 0.25 seconds. We can ignore most of the other fields in both the effects and the weapon (but feel free to explore). The reason for this is simply because we duplicated: many of the fields are already what we want them to be (ie weapon icon, or damage effect type).
Next up is ‘Sun Shooter Attack’ under the Actors list for our Sun Shooter. This actor controls the sounds and visuals of our weapon.
Everything works mathematically, but there is one crucial problem visually. When we did our initial duplication, the editor ignored one Actor which is pretty important... it is the ‘Photon Cannon Attack Missile’ Actor... responsible for giving a visual to the missile of our weapon.
As you can see (image below), this field in our Attack Actor is set but if you double click it, it just points to nothing but raw text. Sorry, we will have to manually copy paste this actor ourselves...

Note: In patch 1.4 I believe you can check-off the 'attack missile actor' initially and avoid this step. However, I didn't/couldn't at the time of making this so just follow along with me :)
To begin, switch to the Actors tab of the data editor (either through the drop-down or by clicking the tab if already visible).

Now search for “Photon Cannon” and change the Data Source back to “All Data”:

Click on ‘Photon Cannon Attack Missile’.
You may notice there is also “Photon Cannon Turret” in this actor list (image above shows it too). This actually needs to be copy-pasted while we're here.→ Yes, earlier we duplicated a turret with our Sun Shooter... but the Turret itself requires a Turret Actor... which unfortunately wasn’t shown in our original duplication checkbox list (similar to how the Attack Missile actor wasn't).
So Copy+Paste that Photon Cannon Turret.
Both renamed actors have disappeared again so we have to clear the Search box of Photon Cannon and change Data Source back to your map (ie C:\...\versus td tutorial...).
Click on our newly renamed Sun Shooter Attack Missile. We need to fix some things:
In the popup window, change it to be Weapon – Sun Shooter Weapon (which is the missile unit we duplicated originally... who has been actorless up to this point).

That fixed most of it, but it accidentally auto-changes the Art-Model to be incorrect:

Double-Click this field.
You could pick something else if you like... And that’s it for the Attack Missile actor!
Onto the turret actor... Currently our Photon Cannon (or ‘Sun Shooter’) will not turn its little turret-ball when targeting enemies. Easily fixed though...
We are done with actors! Since our Sun Shooter will directly replicate a Photon Cannon, we do not need to change anything in its main actor (ie icon, sounds, model, scale, tint, etc...). I will be showing that for the 2nd tower though.
Switch back to the Units tab. Click on our Sun Shooter.

→ Let’s go through and clean up the fields!
First is the Command Card:
Next field is “Behavior – Behaviors +”.
Scroll down to “Cost – Cost”.
Slightly below is “Editor-Description”.
Move on down to “Movement – Pathing Footprint”.
Next are the Shield fields. Not essential, but we will remove all shields (that Protoss units have) from this tower.
YAYYYYYYYYYY... ONE TOWER DONE! If you’ve kept up, good job... this is intense stuff...
Now we will make a 2nd (and last for this tutorial) tower. It will not be for the Sun team; instead, it will be for the Shadow team (Shadow Blade will be its name, and it will be a Dark Templar shooting fire!)
Right click on our just-finished Sun Shooter unit, and click Duplicate:
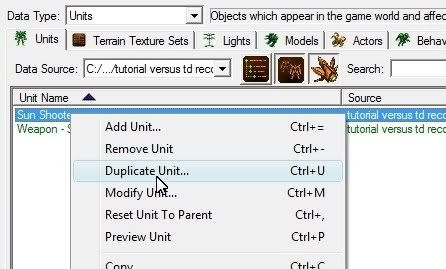
We will be duplicating based on our tower since it will save us the most time. I’ll be going a bit faster now (less pictures) for things we’ve already done.
In the popup window with checkboxes, check off the following:
Hit OK now.
Again we have to mass rename: → And as before, assume by ‘rename’ I mean double click the item in the object explorer and type in a new name, hit suggest, and then OK.
1. (Weapons) Sun Shooter Copy.
2. (Effects) Sun Shooter Damage Copy.
3. (Effects) Sun Shooter LM Copy.
4. (Actors) Sun Shooter Splat Copy.
5. (Actors) Sun Shooter Copy.
6. (Actors) Sun Shooter Attack Copy.
7. (Actors) Sun Team Building Birth Copy:
7. (Models) Sun Shooter Copy.
8. (Units) Weapon – Sun Shooter Weapon Copy.
9. (Turrets) Sun Shooter Copy.
Finally the unit itself, still named Sun Shooter (don’t confuse it with our other one... to be sure, when you double click and the window pops up, the ID should be SunShooter2).
→ Anyway, rename it to be “Shadow Blade”.
Renaming is done!
Next step is to change the model file (in the model) to be the Dark Templar one.
To do this, scroll back down in the object explorer (I assume you have our Shadow Blade tower selected still) and click on Shadow Blade under Models.
Find the field “Model” which should be pointing to something with PhotonCannon in it.
In the popup, search for “darktemplar”. Choose the one that doesn’t have a number:
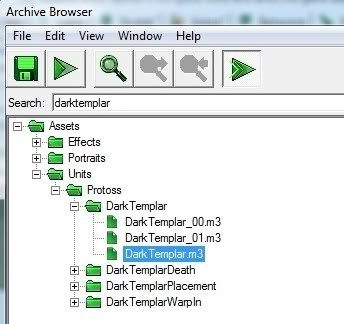
Hit OK and then OK again.
Scroll down (if needed) and Double-Click on the “Texture Declarations+” field.
(Hit the red X button for all of the rows and then hit OK).
Scroll back up and Double-Click on the “Attachment Properties+” field.
(If we didn’t do this, the game would give an error on the Dark Templar creation)
Now we will move onto the “Shadow Blade” Actor.

Firstly we will change the field “Art – Model (Placement)”.
Next to cleanup is “Combat – Custom Death +”.
(Select this row and hit the red X).
Now Double-Click “Combat – Death Effects+”.
These will be the standard sounds and visuals for when this tower explodes (from being sold).
Next, Double-Click on “Sound – Sounds”.
→ This window will have a bunch of “Unknown” labeled items in the list. That basically means no sound for that action. However, we need to fix some of the other sounds in here:
Scroll down now and Double-Click on “UI – Hero Icon”.
The good thing now though is that you can select the “UI-Hero Icon” field (if not already selected) and hit Ctrl+C to copy.
With the icons set, we need to also set the wireframe field...
First actor done! But like before, we are missing the Attack Missile and Turret actors.
So, switch on over to the Actors tab of the Data Editor.
We will come back to those two actors... for now, click on the actor: Shadow Blade Attack.
Find the field “Combat – Launch Assets+” and Double-Click.
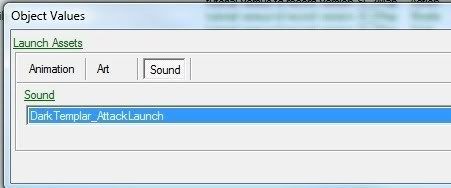
Next is “Target – Impact Map +”. This controls the visuals/sounds when the projectile hits the target.
Attack actor is done, so onto the Attack Missile actor...
Select ‘Shadow Blade Attack Missile’ (should be right below the previous actor).
(This links it to the missile-unit for our tower’s weapon).
You could move on here, but I want to change the look of the Shadow Blade’s projectile so it’s not just a photon energy ball.
Next actor is the Shadow Blade Turret actor. Click on it.
Actors are done! We are not touching the Shadow Team Building Birth actor because since we just duplicated it, it already has our Shadow Blade in its events. You will need to update it as you make more towers though (as I explained earlier for the Sun Team).
Let’s switch back to the Units tab of the Data Editor.
Click on our Shadow Blade unit.
We need to change the attack speed, icon, and range here... since I deemed the Shadow team to be slower and shorter ranged (but higher damage of course).
Now scroll up in the Object Explorer and find “Shadow Blade Damage” under Effects.
That’s it for the effects and weapon.
We now need to change the cost of our Shadow Blade.
Now, with our actual unit object selected, find the “Cost – Cost” field on the right pane.
That’s it for towers! Yep, unless you want to keep making more for each race or adding new races... which you should... only two towers would be pretty lame. I will be moving on now...
... to buttons! We will make some buttons for the towers and for the builders.
Switch to the Buttons tab of the Data Editor:
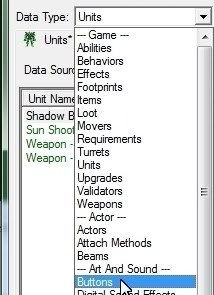
Now change the Data Source to be “All Data” rather than just our maps’.
We just need to copy-paste any button from the list, in my case I copy-pasted “Barrage”.
Double-Click “Barrage Copy” and rename/suggest to be “Build Sun Shooter” and hit OK.
Switch the Data Source back to our own maps’ now... since we just need to see our copied button.
Select our new button if not already selected.
Does 3 damage every 0.25 seconds.
Now we are done with this button... but we need one for the Shadow Blade tower.
So Copy+Paste our newly made button and rename it to be “Build Shadow Blade”.
This button is done! Let's keep going...
Copy+Paste that button, and rename to be “Build Sun Towers”.
Good, now one more button to go!
Copy+Paste that last button and rename to be “Build Shadow Towers”.
Buttons are all done!
Onto the builders... switch to the Units tab of the Data Editor.
Switch Data Source to All Data. Search for “Probe”.
Choose the following checkboxes:
With our new duplicate Probe selected, scroll down in the object explorer and find the “Probe Copy” under Actors:

Now Double-Click on the Probe unit itself (top item in the Object Explorer):

Now you will have to clear the Search field and switch Data Source back to just our map rather than All Data.
Next we will fix up the Unit itself. Click on the ‘Sun Builder’ in the Object Explorer (top item):
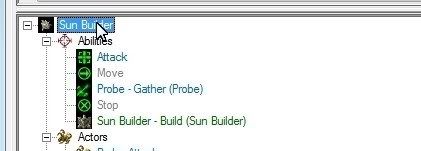
Now Double-Click on the first field on the right (Ability – Abilities+). We need to remove some crap:
Next is the Ability – Command Card+ field.
We need to fix the Warp-In button to be our ‘Build Sun Towers’ one... it’s still set to the original Protoss button right now.
We still need to fix one more thing on this command card: All of the old Protoss buildings!
Next field is ‘Behavior – Response’.
Next, Double-Click the field ‘Combat – Weapons +’.
Double-Click the field ‘Editor-Description’.
Double-Click the field ‘Movement – Collide’.
Double-Click the field ‘Movement – Mover’.
Now you can also change ‘Movement – Speed’ if you wish him to fly slower/faster around... (optional).
Scrolling down, you can set all four ‘Shield’ fields to 0 like we did with the towers.
Let’s make the Builder actually be off the ground.
Near the bottom, find ‘Unit – Flags’.
Our builder is mostly setup now! Just need to fix his build ability to have the tower.
In the Object Explorer, click on the build ability for our Sun Builder:
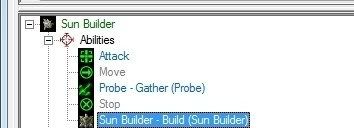
Every field is fine inside the build ability except for one: ‘Ability – Info+’.
Now back in the Object Explorer pane, click back up to our actual Sun Builder unit. → We are going to add the Build Sun Shooter onto his command card as I mentioned we would...
Double-Click on the field ‘Ability – Command Card +’.
One builder down! One to go! Shadow Builder time...
Right click the Sun Builder and hit Duplicate Unit:
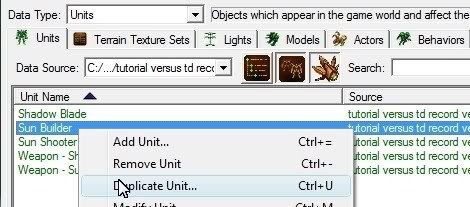
Check-off only 2 things:
Renaming time as usual!
In the Object Explorer, Double-Click on ‘Sun Builder Copy’ under the Actors category.
Next is the build ability: Click on “Sun Builder – Build (Sun Builder) Copy”.
Finally let’s rename the Unit.
Let’s make it so this builder can build the Shadow Blade tower!
Click on our newly renamed build ability from the Object Explorer.
Note: Once you start making more towers, here is a general procedure to follow:
Anyway, let’s go back to the Shadow Builder unit itself.
Switch to Command Card 2 now. We’re going to put the ‘Build Shadow Blade’ button in.
Last step for this builder is to make him more like a ‘shadow’. So, in the Object Explorer, click on the actor ‘Shadow Builder’.
Now the towers and builders are done!
Time to make a few mobs! (two to be exact).
Switch to the Units tab of the Data Editor (if not already on it). We will be duplicating a Zergling.
Change the Data Source drop-down to be ‘All Data’.
Search for “Zergling”.
Right-Click one of them (I chose the one of Data Source LibertyStory) and duplicate it.
Double-Click the ‘Zergling Copy’ (under Actors) in the Object Explorer.
Double-Click the unit itself and then rename to be “Weakling” rather than 'Zergling'.
Once again, now you’ll need to clear the Search bar and switch Data Source to be just your map to see your newly duplicated unit.
We won’t touch the command card since no actual player will see it.
Double-Click on ‘Combat-Kill Resource’ and make it 1 for Minerals. This is unit bounty FYI.
Double-Click on ‘Combat – Weapons+’ and remove the one weapon.
Double-Click on ‘Editor – Description’ and delete the text.
Double-Click on ‘Movement – Radius’, make it around 0.2... just to make sure he fits in single maze lanes.
Double-Click on ‘Movement – Separation Radius’ and also make it around 0.2.
You can also turn down Speed if you like... I did a bit since this is the first wave’s mob.
Double-Click ‘Stats – Life Maximum’ and change it to 16 or w/e number if balanced for your TD.
First mob done! Onto the 2nd one...
Back in the unit list, right click our Weakling and hit Duplicate Unit.
In the Object Explorer, (under Actors category) rename “Weakling Copy” to be “Not so Weakling” (or w/e name you want... be creative... not like me!).
Now rename the actual unit to be “Not so Weakling” and reselect him if it deselects after hitting OK.
First, we’re going to change the actor to be like a Hydralisk. I am showing this so that for future duplications you will understand how to keep changing the model/sounds/icons etc for each wave unit.
So, click on ‘Not so Weakling’ under the Actors category (Object Explorer!).
Actor done! Now let’s adjust the Not so Weakling unit itself.
You can adjust Movement-Speed to be higher if you wish...
Then, make sure to adjust ‘Stats-Life Maximum’ and ‘Stats-Life Staring Amount’.
You could also adjust ‘Stats – Life Armor’ if you wanted waves to have more armor over time...
Yay! We are now done with mobs! You could go and duplicate more if you wish... but perhaps wait until the tutorial is over...
Last chunk of the Data Editor for us will be making the tower-sell ability. The Data-side of the ability will just kill the tower... and then through Triggers (later!) we will reward the 50% sell value or w/e amount.
Switch to the Abilities tab of the Data Editor.
Click on the effect in the Object Explorer
Click on the button in the Object Explorer.
Now rename the ability itself to be “Sell Tower”.
Let’s start with the Button (click back to it):
As for the effect, we don’t have to change anything in it so in actuality we probably did not have to duplicate/check-it-off. But just in case Blizz changes something on the default “salvage death” we won’t be affected.
In the ability itself, we need to fix the ‘Cost – Cost+’ field.
→ It actually costs (by default) negative 75 minerals. This means that it gives the player 75 minerals when they use the ability. We do not want this ‘hard amount’ because we want 50% of the tower value... so we will set it to 0 and do the refunding through Triggers later (as I mentioned).
Now we will add this ability to our towers.
Click on our Sun Shooter first.
Now both towers have a working ‘Sell’ option, but it won’t give any money back until later...
WOOOOOOOOOOOOO!!! Data is done!!!! We can finally move onto triggers!!!! I’ll calm down now...
PART 3 - TRIGGERS
Triggers will control the logic, waves, timing, leaderboard, alliances, etc... very important! They are also very straightforward, and likely more enjoyable than Data editing.
I will explain steps in detail that are confusing or if we are doing them for the first time. Other than that though, I will try to keep it moving quickly.
So, time to switch to the Trigger Editor. Click the ‘gears’ button from the Data Editor or Terrain Editor:

The trigger window will pop up with the Melee Initialization trigger selected. This just does the default actions for setting up a Melee game:
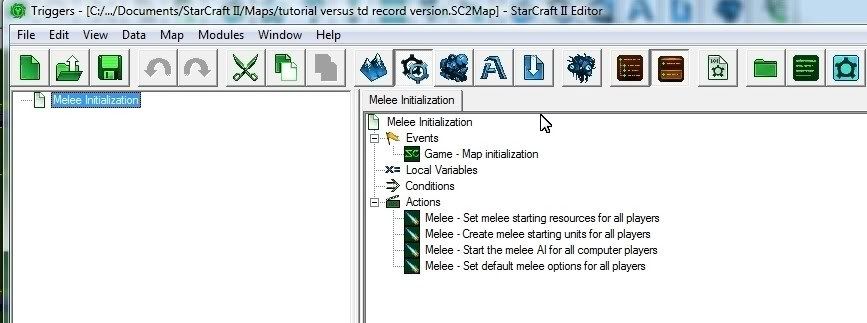
Brief explanation of triggers:
Well, we still want to do other stuff when the game is loaded so let’s keep the trigger... BUT let’s clear out the melee actions.
We will be initializing/creating the race choosing dialog first:
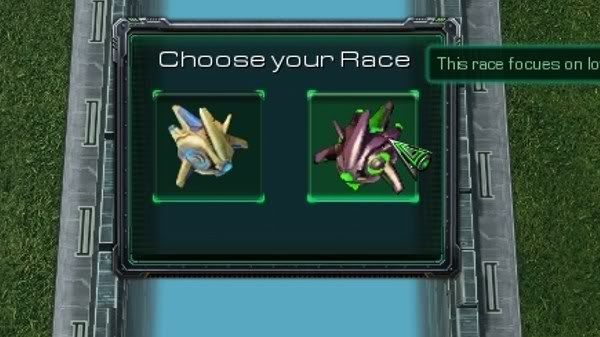
Click on 'Actions' as in the image above the previous one.
With the new action up, we need to change some values: mainly just the size of (500,400).
This is great and all but there’s one issue: we will need to reference this dialog later when the user chooses a race (we have to hide the dialog window). Yet, we have no way to reference it from that (soon to be made) other trigger... unless... we store this dialog in a variable! Follow me on this one...
Right-Click on the left pane and add a new variable:
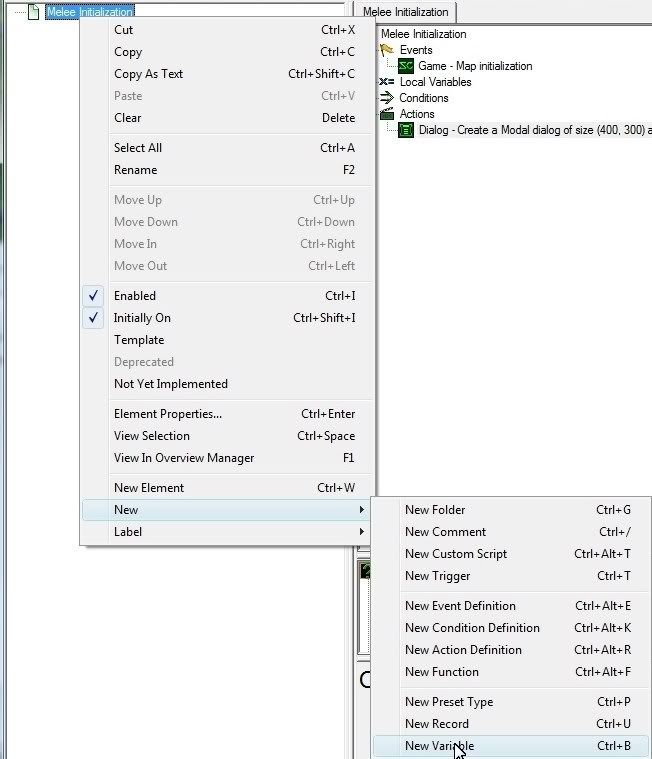
Name it “Race Dialog”.
Now change its type to be ‘Dialog’:
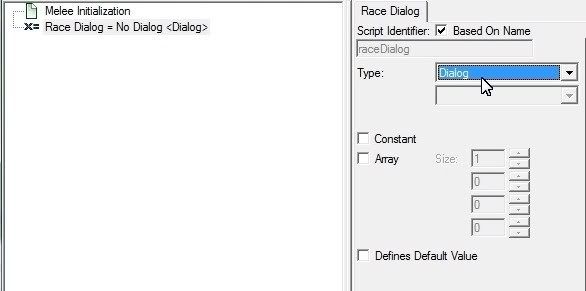
Then, go back into Melee Initialization. Note: You could/should rename Melee Initialization to be just “Initialization” (right-click to rename).
Now click on our Dialog action that’s already there and then hit Ctrl+W (so that our new action goes below the Dialog one).
From the popup window, choose the Variable category and then choose ‘Variable – Set Variable’.
Now you should see:
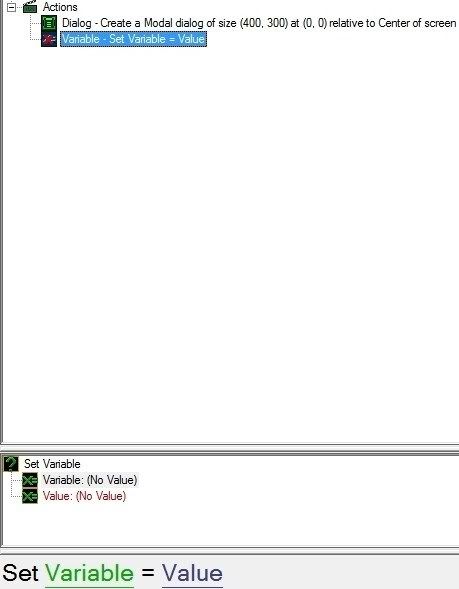
So now for the rest of the game we have a way to easily reference this dialog if need be!
Next, click on our newly made action if not already on it, and hit Ctrl+W to add a new action.
We are making the Choose Sun Team button. Note: Because Dialog Buttons cannot have images on them, we are going to fake it by having this button and then a Dialog Image placed over top of it... anyway...
For this new action, set the following:
This team is adept at fast shots and long range.
Notes:
Now, this newly made Dialog Item Button needs to be stored in a variable too because later we need to know what button the player pressed (go with me on this one).
So, right-click in the left pane and add a new variable as we did before.
While we’re here, (thinking ahead) why don’t you copy-paste our newly made Dialog Item variable and rename it to be “Choose Shadow Team Button”.
Then head back into our Initialization trigger...
Click on our last action in there and then hit Ctrl+W to make another new action.
→ Click on Value, change to the Function radial button, and then choose ‘Last Created Dialog Item’.
Let’s copy+paste for the Shadow team’s button. Select the last 2 actions like so:

Hit Ctrl+C and then Ctrl+V to copy & paste.
This team is adept at close range and high damages.
Now change the 2nd action we copied to be like this:

Choose Shadow Team Button = Last Created Dialog Item. Here is a picture of it all:
We need to add the images on top of each button now...
So, click on the last action (as in the image above), hit Ctrl+W.
For this new action, set:
Copy+Paste that last action and change these values:
Our trigger should look like this now:

Next we need to set the Dialog title.
→ Click on Title and type in “Choose your Race” and hit OK.
Lastly for this dialog, we simply need to show it! So click on our last ‘set title’ action and then hit Ctrl+W again.
→ Change All Players to be Active Players.
We are done with the dialog setup now (but not done with this trigger)... let’s put a break-line before our next actions in this trigger... by break-line I mean simply add a new comment and punch some dashes in it:
In the comment box, rather than have “Comment”, just delete that and punch in 5-10 dashes or w/e you like. This just helps us have visual breaks between groups of actions. You could also use comments for notes to yourself etc...
We are going to initialize the waves now. Basically, we will have a ‘wave counter’ starting from 0. Each wave (every 30s) we increase the counter by 1 which changes what (and how much) spawns.
Overview:
Actual Implementation:
Right-Click on the left pane and choose New->New Variable.
(You may notice I added a comment-line above this variable just for visual separation... you can too...)
Now copy+paste this variable.
We still need 2 more variables to make our waves work:
(In this case I already had it high enough to see the number). → Anyway, I didn’t explain this variable yet... its purpose is simply to let us know how many of our waves we’ve actually made (since we certainly haven’t made 40 types yet). You will have to increase this as you make more mobs in the data editor.
At the end you should have these 4 new variables:
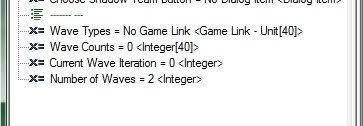
Now click back to our Initialization Trigger.
Click on our last little Comment line.
Hit Ctrl+W to make a new action.
→ Click on Value and search for Weakling in the popup. Choose our Weakling unit type.
Copy+Paste that action ^ and then click on the [0] and change it to [1].
→ Click on Weakling and change it to Not so Weakling (may have to search).
Now hit Ctrl+W again, choose Variable and ‘Set Variable’. → Click on Variable and choose ‘Wave Counts’ from the list.
→ Click on Value and type in 12 (or w/e number you want for the first wave).
Copy+Paste that action ^ and change [0] to [1] again.
→ Click on the 12 and change it to 14 (or you could keep it the same if you like etc...).
And that’s about it for the waves. You can rearrange your actions to look like mine if you like:

→ And a small note: If you made a boss unit for say, the 10th wave, you could just set the Wave Counts[9] to = 1
Next, add another comment-break line in our actions.
Now we will make the Timer and the Timer Window (for the waves).
→ I’m going to assume you're getting more adept with variables and actions so I will streamline tasks we have already done... I'll try and show helpful images though
Please make these variables:
Back in Initialization, we need these new actions (at the bottom):
(These actions are fairly obvious I think...)
Onto some player setup actions now... we will use a simple loop to repeat actions for each player (rather than have to punch out the same 3-4 actions manually for all players).
Make these actions (still at bottom of Initialization trigger):
Up next are the player alliances! The simplest way (I find) is to make everyone an enemy and then re-ally the teams. → Make sure your next actions ARE NOT in the ‘pick each player’ loop. If you click on the line as shown in the image below, then hit new comment or new action, it’ll make it AFTER the loop (what we want) rather than inside it (what we don’t want).
(See ^ the last comment line is not inside the loop...)
Anyway, actions to add:
Next we are going to do some leg-work for when our builders spawn. Follow these steps and then I’ll explain it...
First make a comment-line as usual under our variables on the left pane.
Then, make a new variable:
Now back in the Initialization trigger, add these actions:
(Essentially what we want to have happen is later when player 1 clicks a choice in the Race Dialog, it’ll make that builder for him at his spawn point. Same goes for players 2-4. The long way of dealing with it is saying: “If player 1 chose his race, spawn at point 001, else if player 2 chose his race, spawn at point 002, and so on...” However, like we did with the waves, we can use an array (aka a list) to do this spawning a lot easier. You’ll see later...
Lastly in our Initialization trigger is the Leaderboard!
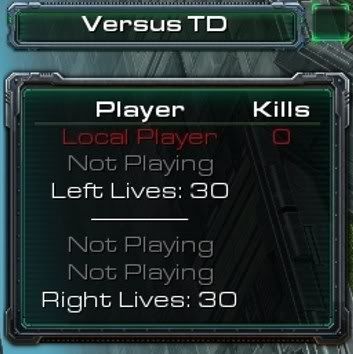
This is going to be some grunt work so get ready...
First, add a comment-line at the bottom of our trigger as usual.
Next, add the following action:
Now back on the left pane, we need to add a new comment-line and then a new variable:
We need this leaderboard variable because later (in several triggers) we will be referencing it...
Next, scurry on back to our Initialization trigger and add a new action at the bottom:
Now keep going... add these actions:
Next we are going to check if player 1 is active and if so we will set his name etc... Otherwise we’ll set his leaderboard row to ‘not playing’.
It will look like so:

So, let’s recreate this ^ set of actions.
The main action is (General) If Then Else.
→ Ctrl+W below our last action and create an ‘If Then Else’ action.
Player 1 is now taken care of on our leaderboard. However, before we begin adding the leaderboard-setup actions for players 2-4 (and lives), we’re going to add a variable and a line that’ll tell us whether the left side has at least one player (and same for right side). Go with me on this one!
Back on the left pane, add 2 new variables:
We will use these variables to control wave spawning (ie if no right-side players are present, we just spawn for the left side and vice versa).
Back to the Initialization trigger:
(Thus if player 1 is in the game (active) then we do indeed have at least one player on the left)
That’s all we need to do for player 1!
Let’s Copy+Paste our ‘If Then Else’ and change it up for player 2:
Let’s fix it up!
(Basically just changing the Row number from 1 to 2, and player 1 to player 2 for three of the actions)
Up next is the ‘left lives’ and the marker-line on the leaderboard:
(I am being very thorough/careful to explain to you where to put the actions. It’s easy to make a mistake... if this ^ action was accidentally inside the ‘Else’ block (rather than outside it)... there would be a very incorrect leaderboard lol. So when I mention to put an action AFTER an ‘If-Then-Else’, this ^ is what I mean.)
Anyway, change row from 1 to 3.
As for the Text, we will need to do a function to combine “Left Lives” and the actual lives the left-side players have. So, follow these steps:
Thus, when the leaderboard is made, it will say ‘Left Lives: 30’ on the 3rd row.
New action now (Ctrl+W), and choose (under Leaderboard) Set Leaderboard Item Text.
---).Now onto player 3 and 4 in the leaderboard...
Again, we have to fix it up!
Now time for player 4! As in the image above, select that ‘General – if (Conditions) then...’ and hit Ctrl+C and Ctrl+V so you have a duplicate once again.
Finally we just need the Right Lives row and then we’re done with Initialization...
The easiest way is to copy our ‘left lives’ action and paste it below the last ‘If Then Else’. So, let’s do that...

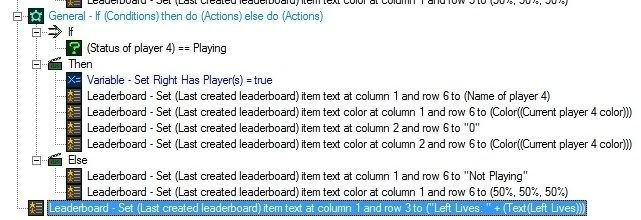
Copy ^ that line. Paste it below player 4’s ‘If Then Else’ like so:
Done... that’s it for the Initialization!
Onto dealing with race-choosing now...
Right-Click on the left pane (where we usually add new variables) and instead go New->New Trigger.
(But you can order your triggers/variables however you want).
With that new trigger selected, you should see a very barren right-side...
Here is a final preview of how our Race Chosen trigger will look:
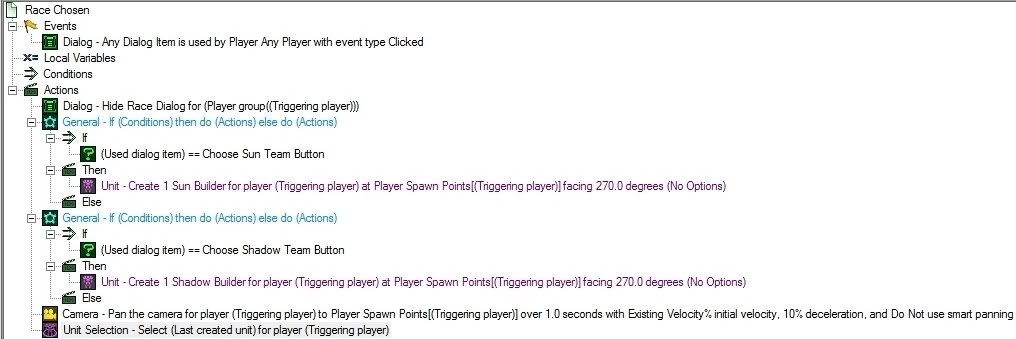
Basic idea is to hide the dialog for the clicking player (aka triggering player). Then if they clicked the sun button, we create a sun builder... same check for shadow button... then after making the builder we pan the camera and select the builder. Simple as that.
Make these actions:
Show/Hide Dialog
If Then Else
Now Copy the big ‘If Then Else’ we just made, and paste it fully below.
Make a new action below our last ‘If Then Else’: this action will be ‘Pan Camera’.
Race choosing trigger is done! I hope it makes sense... by all means watch this part in the video if you wish for a more hands on explanation.
Now we will be making the repeated wave-spawning trigger. Our premise is that every 30s the next wave comes... pretty intense eh!?!?
Anyway, add a new trigger as we did for Race Choosing, except call this one “Spawn Waves”.
Add a new event for this trigger ^ called ‘Timer Expires’.
Then, we will be making these actions:
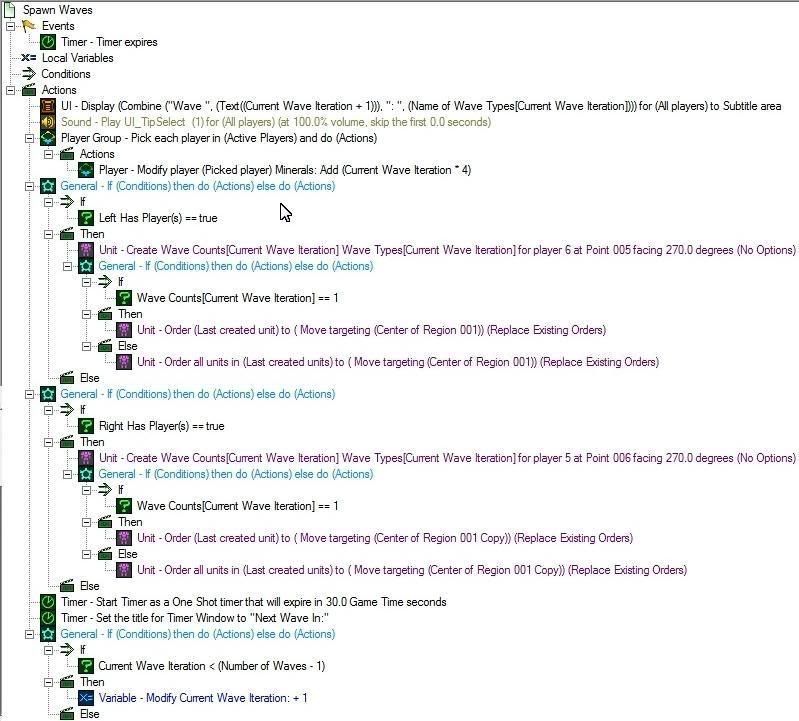
Quite long eh? In actuality, it’s not that complex:
So, let’s make the actions!
The first action to make is ‘Text Message’ under the UI category. I will explain how I strung together so many things (very valuable info!)
(It will display “Wave “ then the wave number, then “: “, and then finally the name of our current wave type. All in all it will look like “Wave 1: Weakling”.
Now, add a new action: ‘Play Sound’ under Sound category.
Next is the player mineral bonus, so add a new action: ‘Pick Each Player in Player Group’.
Make a new action after our ‘Pick Each Player...’ action... an ‘If Then Else’ action.
Click on ‘If’ and add a condition (Comparison one as usual)
Click on ‘Then’ now. Add a new action: ‘Create Units Facing Angle’.
After our last ‘create unit’ action, add a new action (still in the ‘Then’ block). Choose the action ‘If Then Else’.
Copy (Ctrl+C) and Paste (Ctrl+V) it so you have a big duplicate below it. Now scroll down to our duplicate...
Now make a new action completely BELOW the last big ‘If Then Else’. This action will be ‘Start Timer’ from the Timer category... the last part of our trigger should now look like this: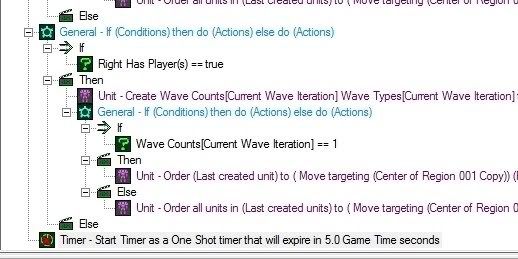
Continuing on with our Timer action:
Add a new action below again, this time ‘Set Title for Timer Window’.
Add a new action: ‘Modify Variable (Integer) under Variable category.
So, add a new ‘If Then Else’ action BEFORE our last action. Should look like so:

Now drag our ‘Variable – Modify Current Wave...’ action into the ‘Then’ block like so:

→ Now your entire trigger should resemble our ‘goal’ image I showed earlier!
→ Do you understand what this ‘if statement’ does? Simply, if (the current wave) is less than (the number of waves minus 1), we go ahead and increase the wave count... otherwise we do nothing. Therefore (example) if we were on wave 0 (the first wave), it would check if: 0 < (2-1), which is 0 < 1 which is yes and thus increase current wave iteration by 1. However, if we were on wave 1 (the second wave), it would check if: 1 < (2-1), which is 1 < 1 which is not true and thus the current wave iteration stays at 1...
A different solution could be to just end the game if we are on the last wave and declare the side with more lives as the victor. I won’t be showing this though.
This trigger is done! We’re about 65% done with total triggers!!
The next trigger is to check when a wave unit dies and then update the Leaderboard’s player kills.
Add a new Trigger on the left pane and call it “Unit Dies”.
→ I will show a picture of the whole trigger at the end for this one because it looks confusing at first.
Event will be ‘Unit Dies’ from the Unit category.
Add a Comparison condition under Conditions.
So now before we go into Actions, we need to make a ‘player kills’ variable to keep track of each players’ kill count.
On the left pane, add a new Variable and call it “Player Kills”.
Back into our ‘Unit Dies’ trigger: add a new action: ‘Modify Variable (Integer)’.
Now that our variable counter is increased, we need to update the leaderboard. It doesn’t automatically update itself... but to update the leaderboard we need to check which player was the killing player (because player 1 means row 1 of the leaderboard, player 2 means row 2, player 3 means row 5, and player 4 means row 6).
Add a new action after our last one: an ‘If Then Else’ action.
The basic idea is that we check if the killing player is 1 or 2, and if so, update their leaderboard kills since their row is the same as their player number. Otherwise if it’s not 1 or 2, then check if it’s player 3. If so, we update his leaderboard kills. Otherwise if it’s not 3, we check if it’s 4 and if so update his leaderboard kills. Beyond that we do nothing. I hope you understand the chains of if-then-elses we have going here...
Our Unit Dies trigger is basically done aside from one technical fix we should do to prevent glitches. Whether or not you like it, in SC2 if AOE-damage kills a unit, it will cause this trigger to run twice for that one dead unit (a bug possibly...). People used to tell me on my old TD tuts that their ‘end of round’ triggers would run twice randomly and we didn’t know why or when... until we finally figured it out.
Luckily, there’s a relatively easy way to deal with it. We just (metaphorically) stamp a unit when our ‘Unit Dies’ trigger runs (for that unit). Then, if it happens to run a 2nd time on the same unit, it’ll see the unit has already been stamped and quit... preventing a ‘double run’ of the actions.
So back at the top of our actions for the trigger, add a new ‘If Then Else’ action. Should look like this:
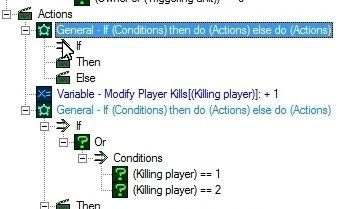
Now below our newly made if-then-else, add a new action: ‘Set Unit Custom Value’.
Should look like so:
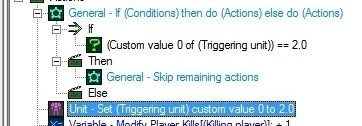
(Custom values are just numbers (Blizz gave us) we can store on the unit... purely for our own reasons).
So, let’s say an AOE damage effect kills a Weakling which causes this trigger to get run twice at once (well not exactly at once... but almost at the same time). The first run will come in and check custom value 0 and see it’s not 2.0 and then move on, setting the dieing unit’s custom value 0 to 2.0 and w/e else with the player-kills actions. Meanwhile the 2nd run will come in and check custom value 0. It’ll see that it is indeed 2.0 and it’ll skip the remaining actions of this trigger... thus preventing a re-run!
The trigger is done! Here is an image of it:
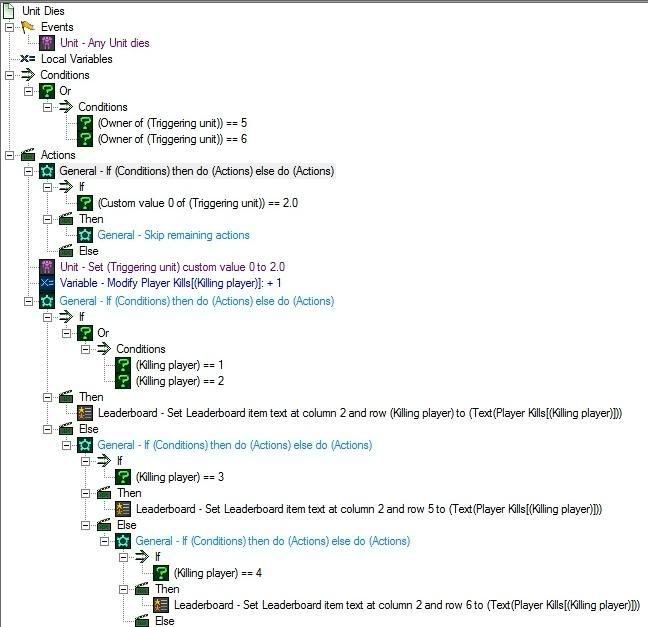
The next 2 triggers will be dealing with when a wave-unit reaches the end region of its side. Here is the trigger for the left side:
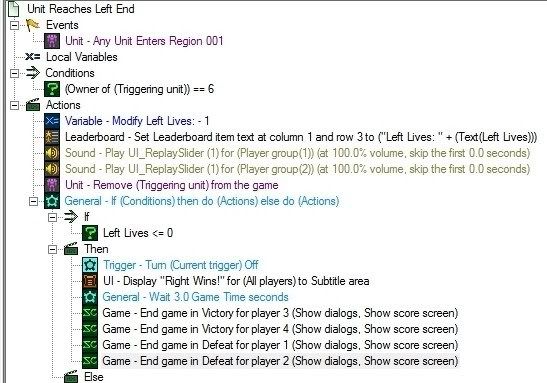
We check that the unit entering the left end-region is owned by player 6... Then we lower the left lives by 1, update the leaderboard, play some sounds, and remove the unit. Finally we check if the game should be over (ie left lives have just become 0).
Let’s begin!
Make a new Trigger (in the left pane as always) called “Unit Reaches Left End”.
Add an Event: ‘Unit Enters/Leaves Region’.
Add a new condition (Comparison).
Add a new action: ‘Modify Variable (Integer)’
Now we will need to update the leaderboard... but let’s save ourselves time:
Next we will play a sound for the losing players, so add a new action: ‘Play Sound’.
Copy+Paste our last action ^
Add another new action: ‘Remove Unit’
Now we need to check if the Left Lives has hit 0. So, add an ‘If Then Else’ action.
This trigger is done!
Let’s do the right side now... everything is basically the same except some values have to be switched.
So, copy+paste our ‘Unit Reaches Left End’ trigger. Rename it to be “Unit Reaches Right End”.
Change the Event:
Change the Condition:
Change the first action:
Find the Leaderboard action:
For both Sound actions:
Now for the 'If Then Else':
We are essentially done, but have to make one more fix to both of our ‘unit reaches end’ triggers.
Now, when the left side causes an end-of-game, it’ll turn off the right-side trigger (and vice versa). This will prevent the game from potentially ending twice if both sides reached 0 lives around the same time (could happen!!).
Here is the image of the ‘Unit Reaches Right End’ trigger:
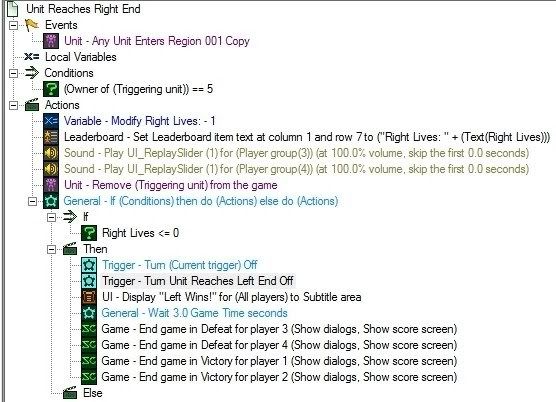
(Note: I won’t show an updated image of the ‘Unit Reaches Left End’ trigger since we just added that one ‘turn trigger off’ line...)
Okay folks, just 4 small triggers to go!!! Up next is anti-block... It will work by checking RIGHT after a player starts building. It will check whether or not a unit could spawn and successfully reach the end region... and if it can’t we refund your building instantly.
Make a new Trigger and call it “Anti Block Left Side”.
Event will be ‘Unit Construction Progress’.
Add a Comparison condition to the Conditions.
Copy+Paste this last ^ condition.
We need to put both of these conditions under an ‘Or’ condition... so add a new condition of type ‘Or’. Then drag both of our previous conditions under that ‘Or’.
Now add a new condition after those last 2 conditions... of type Comparison.
We need to fix up our conditions now... the hierarchy is wrong...
What this means is that if the constructing (aka triggering) player is player 1 OR player 2, AND there is no path from the (left lane) start to (left lane) end for a mob, then we can proceed into our actions which will refund the building...
So, add these actions (order is important for the first 2 actions):
Left side is done! Here is the image...
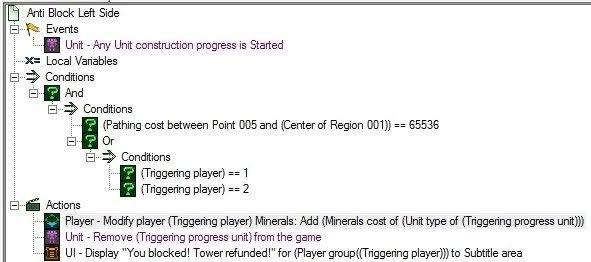
Let’s duplicate this last trigger: Back on the left pane, copy ‘Anti Block Left Side’ and paste it.
Time to fix up some conditions:
Actions can remain the same!
Here is the right side’s trigger:
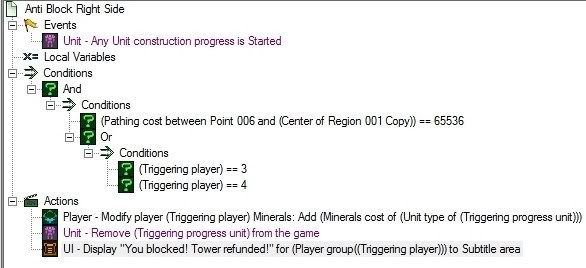
Next up is dealing with when a player leaves the game...
On the left pane, add a new Trigger. Call it “Player Leaves Game”.
Event is ‘Player Leaves Game’
Add a new action: ‘Wait’
Add another action: ‘If Then Else’
So what does this all mean? It means that when a player leaves, we wait 1 second to make sure they are fully registered as disconnected... then we check ‘if’ either side has no active players... ‘then’ we will end the game (we’ll make this part in a sec). That’s what this hierarchy of conditions does... if Player 1 AND 2 are not playing OR player 3 AND 4 are not playing.
→ However, in the case that the game is not over, we want to still update the Leaderboard to say “Player has Left” or something along those lines. To do this we will save time and copy from a previous trigger.
Go into our Unit Dies trigger. Copy the big If-Then-Else (see image below for which one):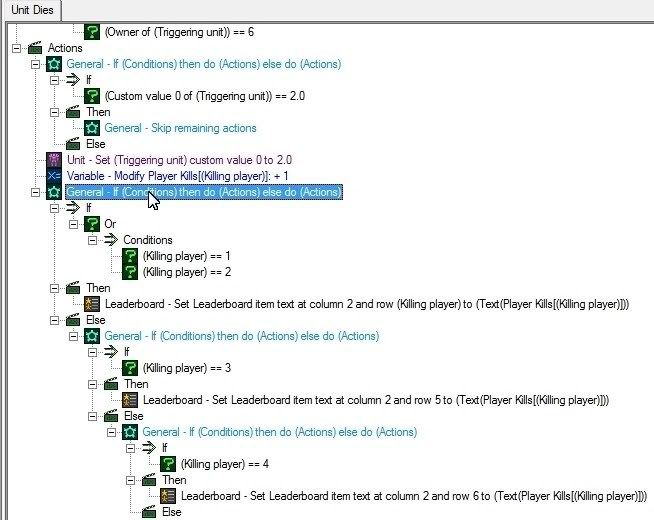
Now switch back to our ‘Player Leaves Game’ trigger.
Okay, onto the last trigger! A SUPER EASY ONE TOO!
On the left pane, add a new trigger; call it ‘Player Sells Tower’
Add the Event ‘Unit Uses Ability’
Now let’s add an action: ‘Modify Player Property’
Check that it looks like this:

Pretty simple... when the tower is ordered to sell (ie player clicks sell button), we give that player (in minerals) the value of the unit divided by 2... aka 50% refund!
Yep. That’s it. Tutorial over. Go play and I hope it works for you!
Now you can add more towers, more waves, more races/builders, and w/e else TDs have these days.
Let me know if there’s anything you think could/should be fixed or changed on this tutorial.
I used to send people to your other TD tutorial, now I will send people to this one. :)
You awesome man.
:D
You are the man OneTwo ! And you've put lot of care: text colors !
I won't make a td, but I'll watch some part of the tutorial, I think that I've seen dark templars firing flames and having interesting sounds... anyways, thank you for sharing some of your time with us :)
@grenegg: Go
Thanks. I think the video is easier to go through too. While writing the text version of this, I realized how thorough you have to be because I can't just tell people "Change the condition"... you have to know that you click on the left-bracket of 'owner of triggering unit' to change it... stuff like that which made this text one so long...
Still working on orange/blue text coloring.
Holy moly... :O
Thanks for doing this. I bet You've beaten a Guinness record for the longest tutorial :D
Again, awesome stuff man.
On a side note, how would you go about generating a bunch of waves with different unit types in them? Say I wanted to create 20 waves composed of different amounts of 5 different unit types (ie: wave 1: 15 zerglings, 5 hydras, 2 roaches, 2 mutas, 1 ultra. Wave 2: 20 zerglings, 10 hydras, 5 roaches, 4 mutas, 2 ultras. And so on)
I've tried various approaches, but it seems like i'll be forced to create a huge amount of data without being able to use loops. Any way to populate an array like so: "Wave 1 (int array) = [15] [5] [2] [2] [1]" instead of having to set each index manually?
Trying to avoid a bunch of grunt work :)
Thanks OneTwoSC that was amazing.
was my first time using this software (i bought sc2 2 days ago just so i can play about with galaxy) i found it very easy to follow this tutorial and i made a few mistakes (spent an hour trying to find out why i couldnt link to my race buttons, they were new dialog's not dialog items lol my bad) but this has given me a brilliant headstart into understanding how everything interacts.
i love how you have made everything very clear and precise the order with which to do things and such, having the images there for those nested if-then-else statements and also being able to refer to your video's when i did get into trouble was very helpful. also you didnt pull any punches man, as a begginer tutorial the scope here is massive, leaderboards, antiblocking, its mad!
i now have a fully functioning TD with tons of unique waves, next up more towers!
@Deammer: Go
It's obviously going to be more work to do that. But I would start by simply making wave_types[] and wave_counts[] as 2 dimensional arrays. Meaning you increase the 2nd 'size' for each ones array to 5 rather than 0. This way in your initialization you can go (assuming your example):
Wave Types[0][0] = Zergling
Wave Types[0][1] = Hydralisk
Wave Types[0][2] = Roach
Wave Types[0][3] = Mutalisk
Wave Types[0][4] = Ultralisk
Wave Types[1][0] = Zergling
Wave Types[1][1] = Hydralisk
Wave Types[1][2] = Roach
Wave Types[1][3] = Mutalisk
Wave Types[1][4] = Ultralisk
(May seem a bit repetitive but being this exact will let you change which 5 unit types are spawning... assuming later on a harder or different set of 5 unit types would be spawning)
Wave Counts[0][0] = 15
Wave Counts[0][1] = 5
Wave Counts[0][2] = 2
Wave Counts[0][3] = 2
Wave Counts[0][4] = 1
Wave Counts[1][0] = 20
Wave Counts[1][1] = 10
Wave Counts[1][2] = 5
Wave Counts[1][3] = 4
Wave Counts[1][4] = 2
Then in the wave spawn youll have to add/fix actions... (ie create Wave_Counts[Current wave iteration][0] of Wave_Types[current wave iteration][0] at w/e point and then order to move. THEN create Wave_Counts[Current wave iteration][1] of Wave_Types[current wave iteration][1] at w/e point and then order to move... repeat up to [4].
@hydropocalypse: Go
Thanks bud! It sounds like I paid you to say that lol... glad you found the tutorial. My first text/vid combo. I'll be adding in links to parts of the vid throughout the text-tutorial soon.
Also, you're not the first one who messed up dialogs vs dialog items. I'd say thats #1 or #2 in terms of peoples' errors over the last year of tutorials lol.
@OneTwoSC: Go
Yeah I can see why you like making video's more than the text. You can't do any "click on this" or "look over here".
That is why I personally don't like the text versions as much. The only thing is that you can't CTRL-F a video :D
Great to be back and part of the community again!
@TacoManStan: Go
yeah I really agree about that... and coming up on searches too.
@OneTwoSC: Go This just in. Youtube has copyrighted their search text/speech inside video technology.
@ the tutorials: yeah that was long enough
Awesome tutorial OneTwoSC, I really appreciate you taking the time to go through that.
I read through the guide and watched the video and got everything up and running, towers work, units die and such.
I have one (two) problems with it though with the Leaderboard updating kills and lives. I've looked over the guide and matched everything up as best I can, picture perfect mirror of what you did, but the numbers never change.
It's clearly tracking the live though, cause a player will die if 30 lives are lost, but the leaderboard won't update to reflect it. Here's how my Unit Dies trigger looks, seems to match with yours as far as I can see.
Am I missing something?
@GRPGM: Go
That part looks fine. Can you post an image of your initialization trigger (the leaderboard actions in there)
@OneTwoSC: Go
Sure, here's all the Leaderboard stuff from the Initialization trigger.
NEVERMIND! I found it finally :) I had missed adding in Set Leaderboard = (Last created leaderboard) I feel like an idiot for missing that -_-
Still, thanks again for the tutorial, I had a lot of fun putting the map together.
@GRPGM: Go
Awesome haha. I was guessing that would be it...
Hi,
i'm an software engineer from germany and i'm just about to get some expirience in designing sc2 maps. Your TD-Tutorial is a good thing to start with, but i got a problem with the "Player Sells Tower"-Trigger on my map it gets fired like 7 times if i sell one cannon. Do you know how to fix this?
Okay solved this problem while writing... the stage in the event was not "Generic3"
anyway i leave this to say good job!
EDIT: I have found another problem (it is not the time :D) if i copy or duplicate the turret-actor (for "sun cannon") it will get some "UndefinedVariable" errors inside Attachment: CActorTurret_PitchQuery (i use the rawdata format name because of localization(i dunno what the heck they thought about doin a localization of this editor)) and if i use this actor with the "UndefinedVariable" errors left it will just blow up the entire map. If s/o got this error too just make the raw data of this field looks like: ":IGNORE".
Maybe this error is a result of the current patch..
regards Naice.
@NaiceOne: Go
Yeah i had that problem too haha. It'll trigger on all of the events of the casting heh.
@OneTwoSC: Go
Onetwo, I love the tutorial and you have inspired me to make a tower defense of my own this time all the way through without giving up because its too much work. I have looked at some of your older videos on youtube and you have a TD that has some lights that show the way the mobs will be taking the path, is there any way that you can give a tutorial on that?
I have a problem with naming the tower. "4. (Models) Photon Cannon Copy." I don't have this in my Data it does not show any Photon Cannon Copy under the (Models) but everything ells does is this a problem with something i did.
OneTwoSC,
I have been struggling with this for a LONG time now. Not just THIS specific tutorial. But practically ALL your tutorials. Now, I understand that this is from v1.3.6 of the editor, and that we are now on v1.4.3 or something. But the problem I have run across has been THE EXACT SAME THING. Both for the videos and this text version.
When duplicating a unit and trying to follow along with the tutorial (text/vid), the Editor will NOT copy the actor properly. For this instance, I am trying to make the Sun Builder and this seems to go "with no issues". I find the Probe in the main files, I right-click and then choose Duplicate. I check ALL the boxes you instruct me to but then I end up with the standard "green man" icon next to the main object in the object explorer. Also, there is absolutely NO Actor at all associated with this duplicated unit.
If I swap over to the Actors tab, there IS a "Sun Builder" actor. However, it is not associated with the Unit. When I try and muddle around and make the Editor use the actor (instead of "Probe" or "Probe Copy"; usually also may have an "(Unknown)" thrown in next to it), nothing changes. Still the "green man" in the Object Explorer. Going back to the Main Window under Units (to add one into the map), choosing "Player 1" and then "Unit", doing a search for my unit (in this case "sun") brings up the same problem: "Sun Builder" with the annoying "green man" icon next to it and clicking it and then a spot on the map drops a "nothing" into the map. I hear a sound, and a colored [red] box appears on the mini-map. But nothing actually shows up in the view on the main window.
This is pretty much the most frustrating thing! It's been happening for SO long and has literally put a monkey-wrench into anything I am attempting to learn from you! I do not know where to turn. I have muddled through before and gotten "it to work" by just improvising. But I want to know why it works for you and not for me! Can you help!?!?!?